
Forum Replies Created
-
AuthorPosts
-
The final bits of trim are back on the car and it’s about as ‘together’ as it can be. I’m now test driving and working through an autumn snag list.
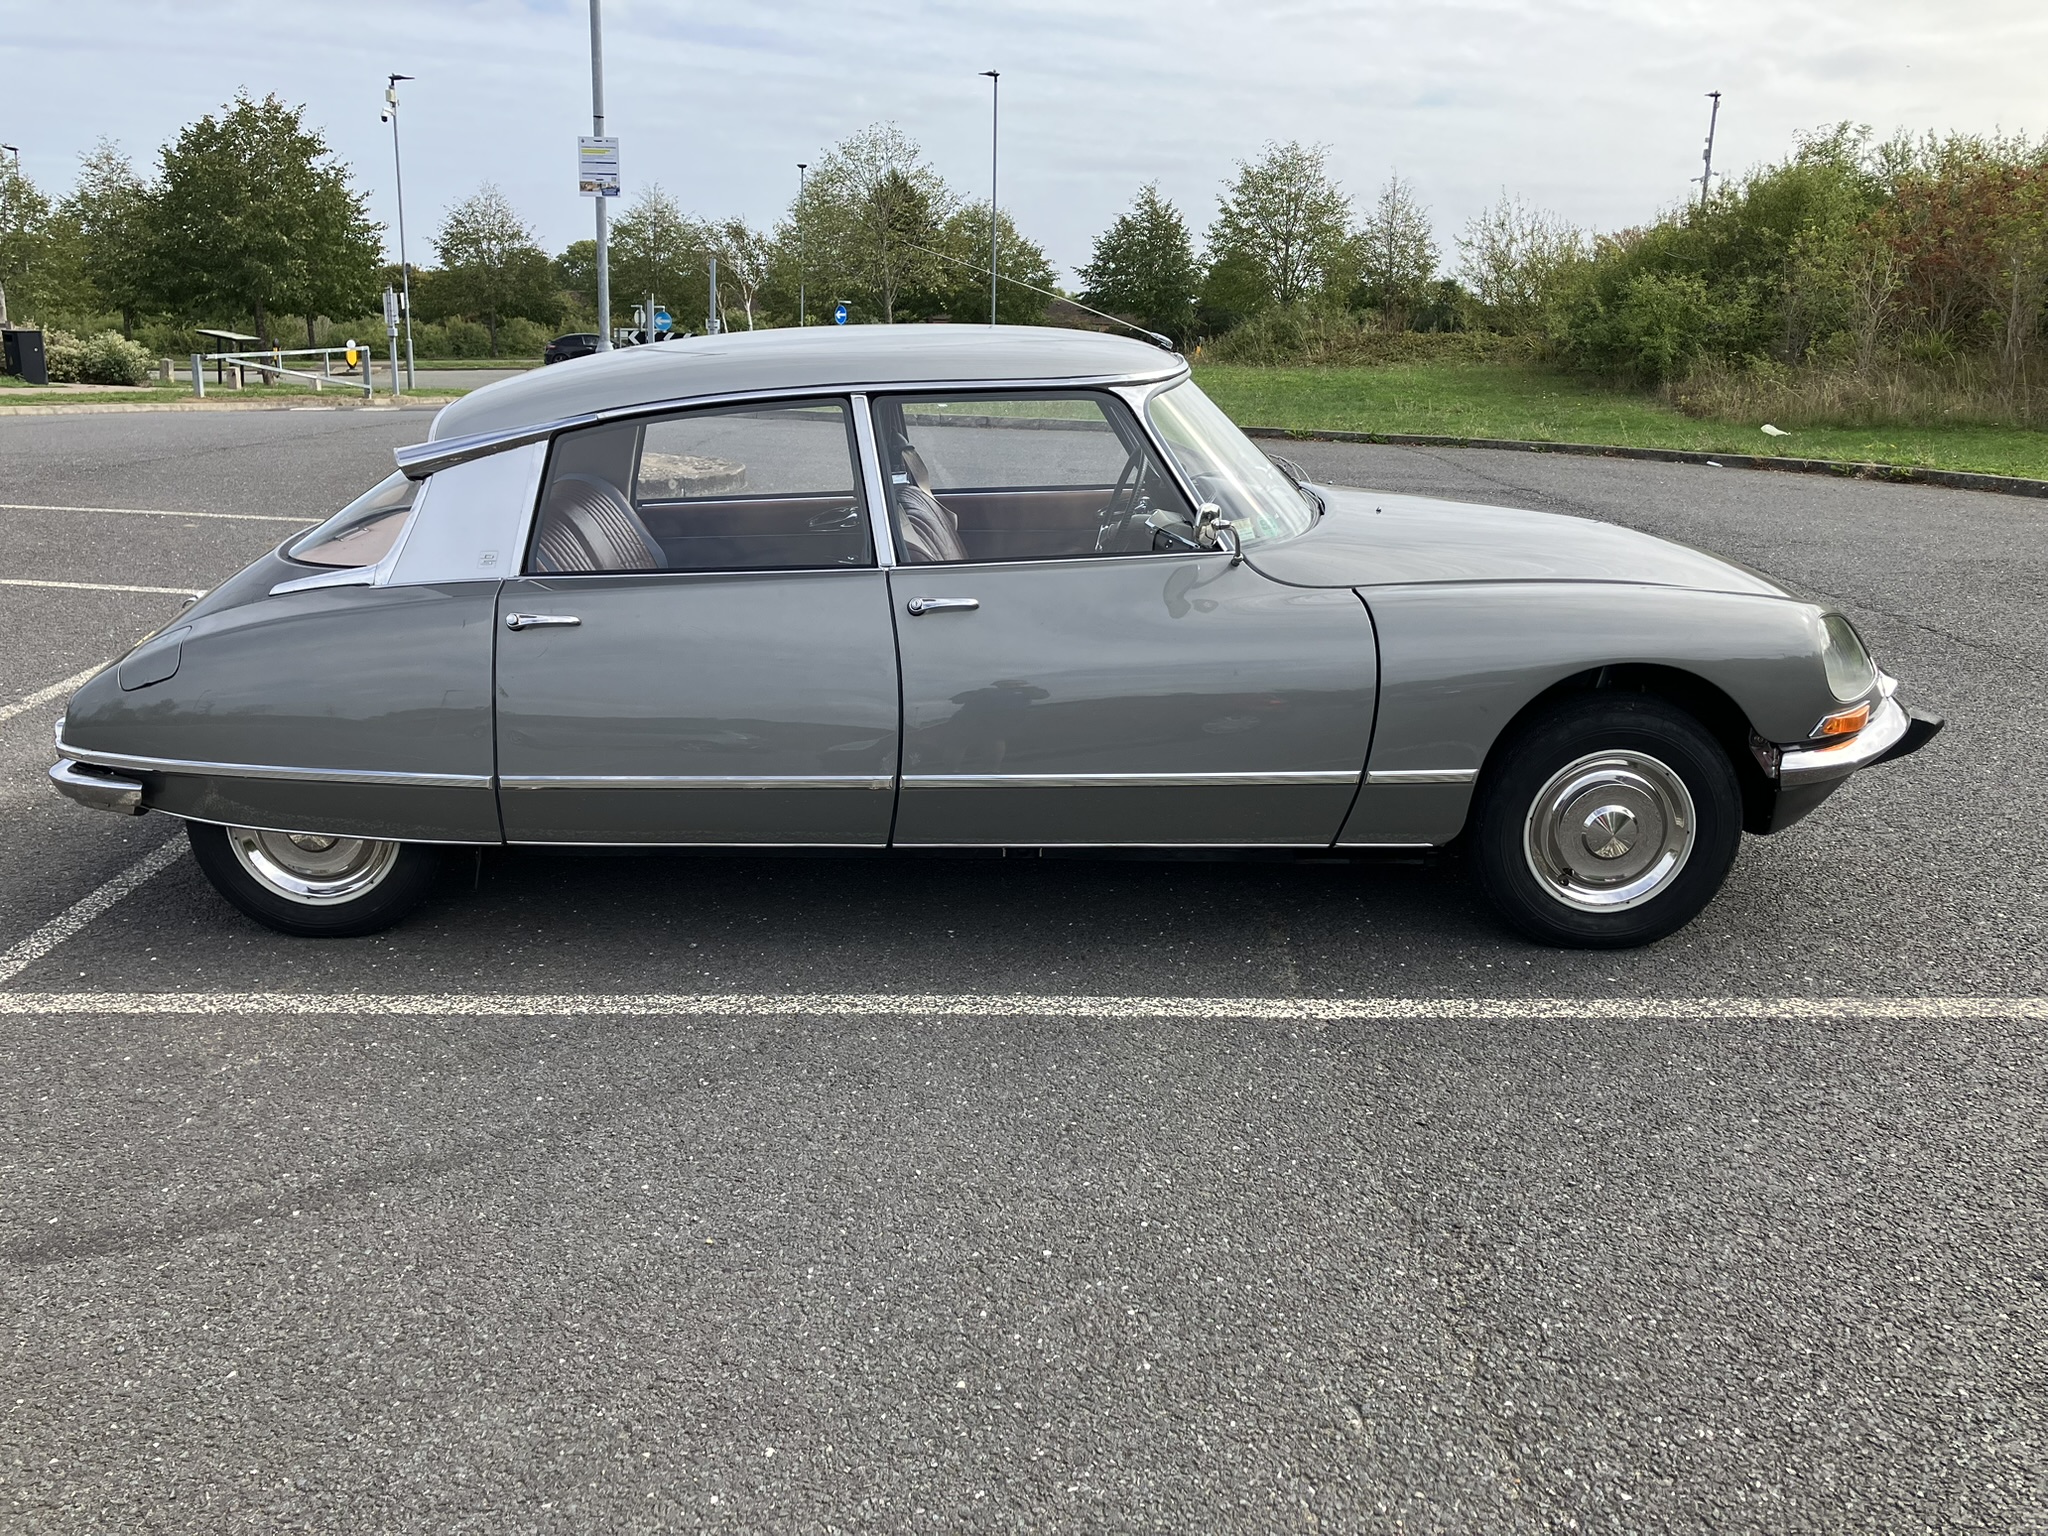
When i put the dashboard in i found that the red hydraulic pressure warning light on the dash only worked intermittently. eventually it completely packed up.The light is negatively earthed. it’s controlled by a hydraulic switch down at the brake mushroom that breaks the lights path to earth when the car reaches a certain pressure. I traced the circuit and confirmed my suspicion that the switch wasn’t closing and making a circuit. Dirty contacts the suspected cause.
I took the switch off the car yesterday. It’s part of the mushroom brake assembly.
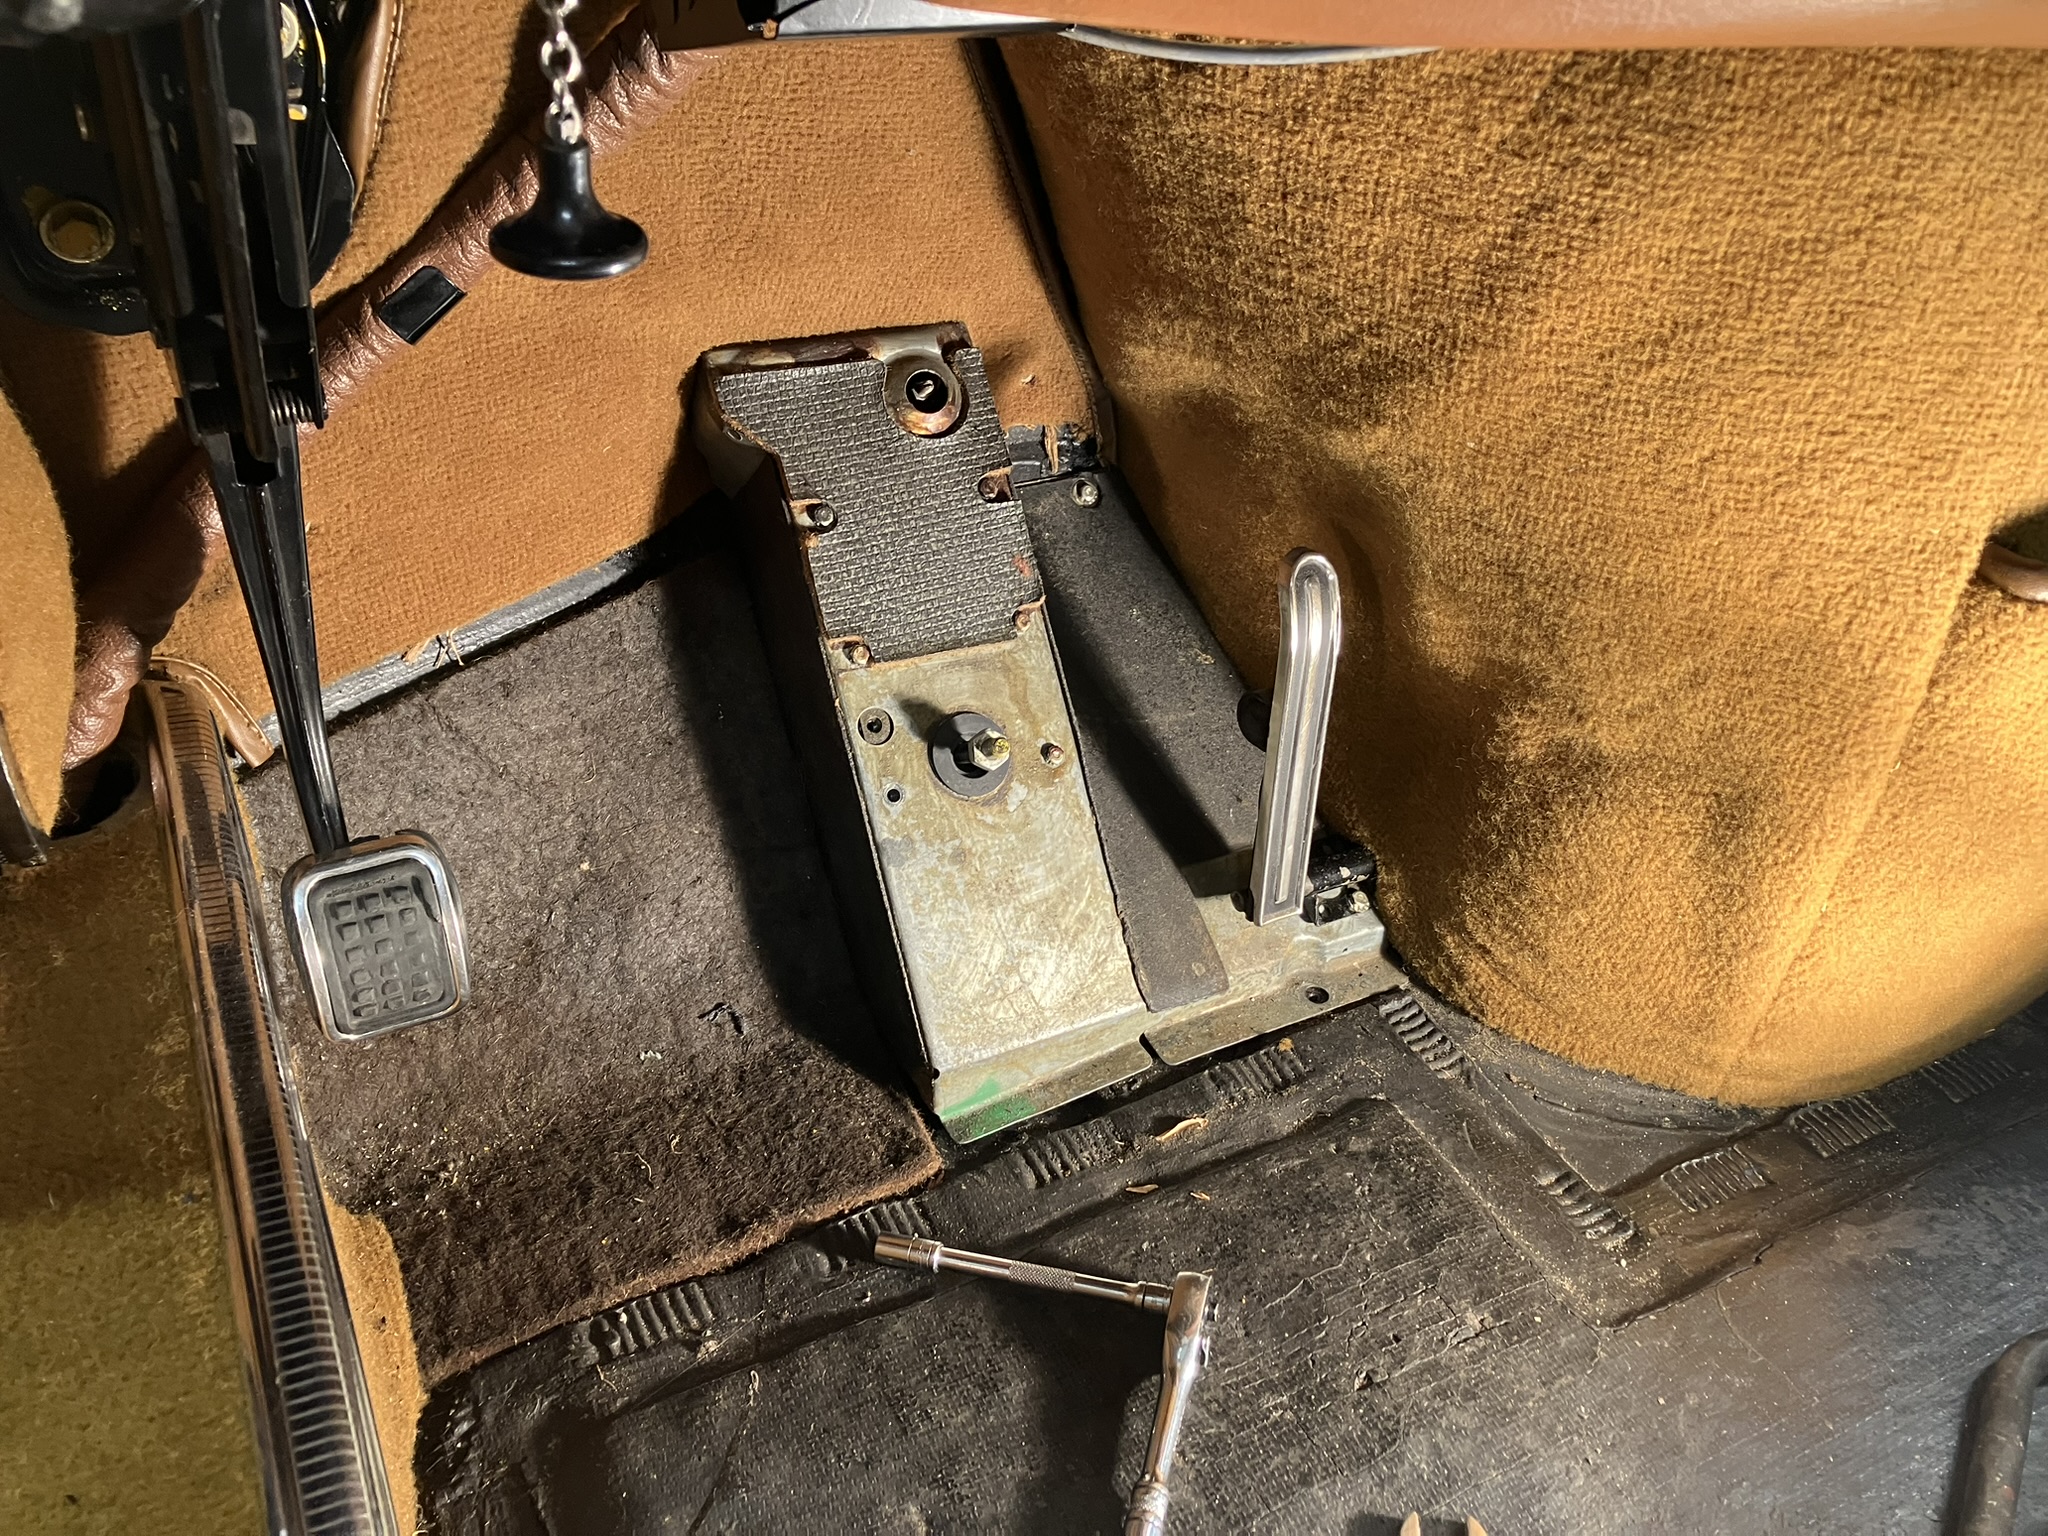
It’s a calibrated and (then) sealed unit.

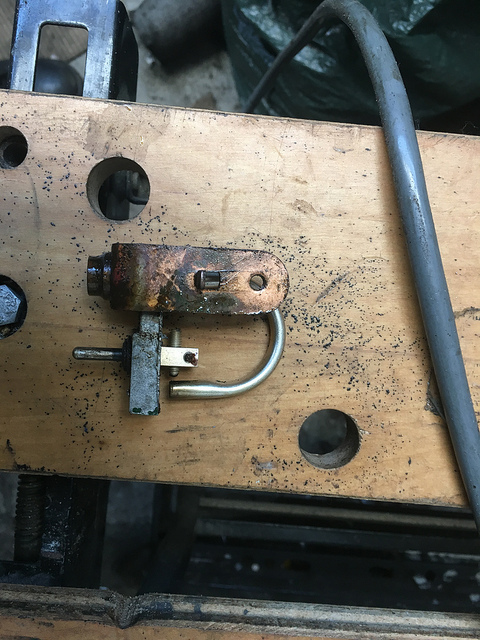
Not my photo but inside it looks like this. A simple screw pin that makes contact with the curved hydraulic pipe. As the pressure rises, the pipe straightens very slightly and contact is broken.
My cover is still sealed on. By a combination of flushing with switch cleaner and compressed air i got it going again. I’m lucky enough to have a Citroen hydraulic test bench so took the opportunity to follow Operation D.453-0 and check the unit out.

VERY much to my surprise, i found the light cut out when pressure reached 23 bar. it’s meant to cut in/ out at between 60 and 70 bar! So if pressure drops to 60, your warning light comes on. mine won’t come on until it’s down to 23 bar! that’s way out of whack!
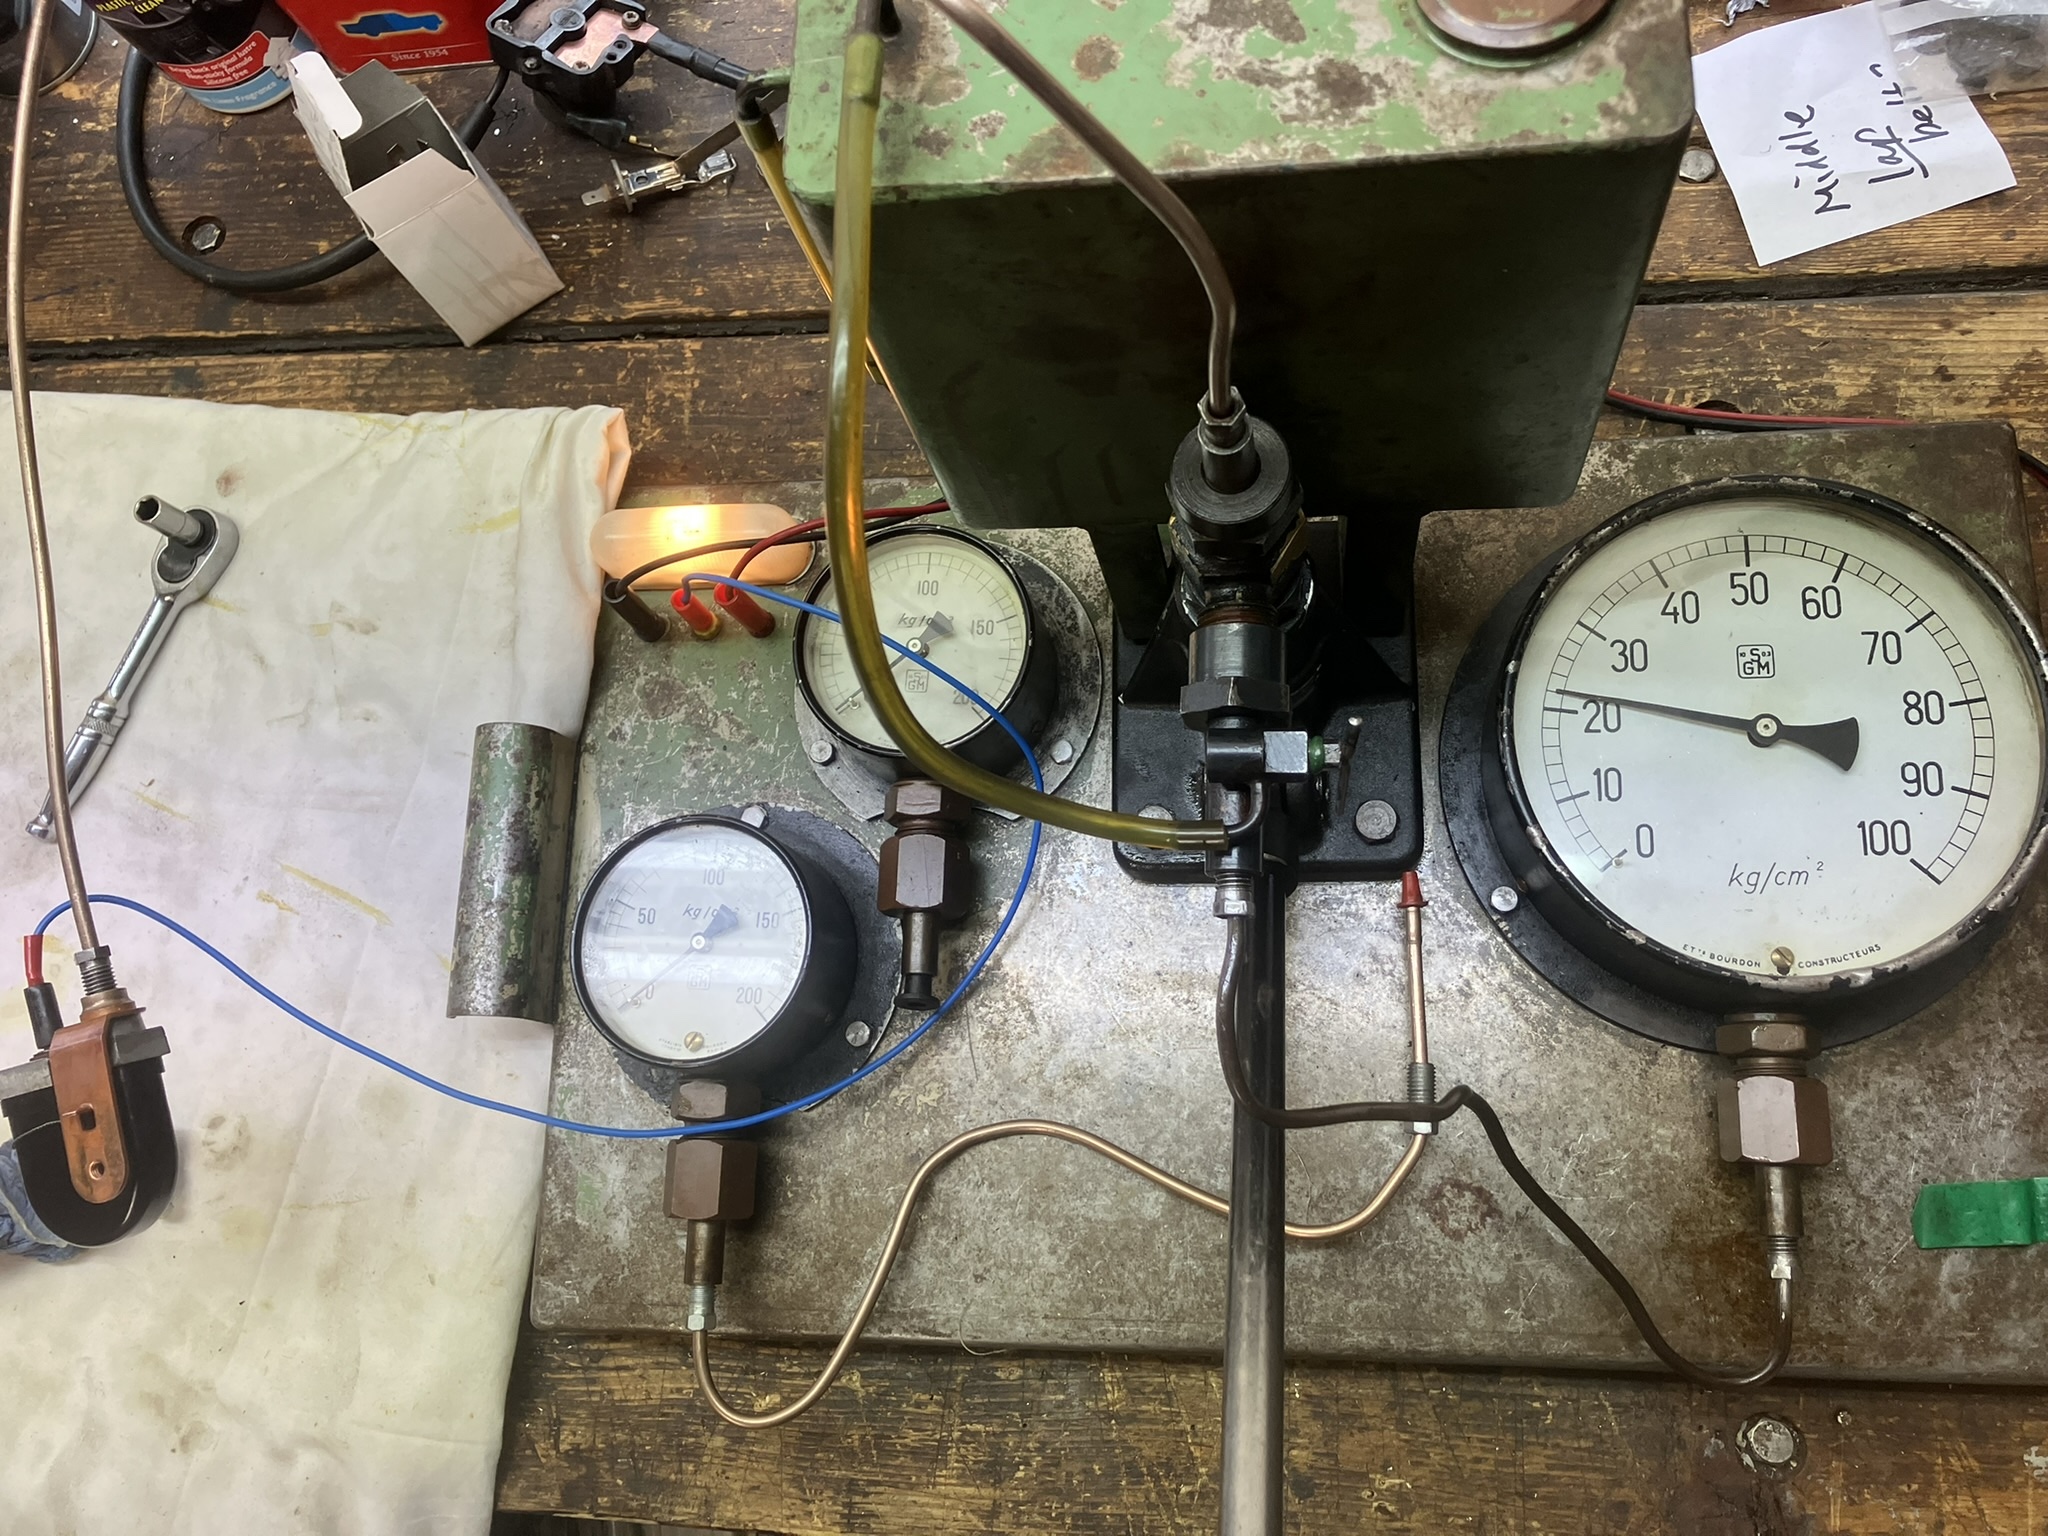
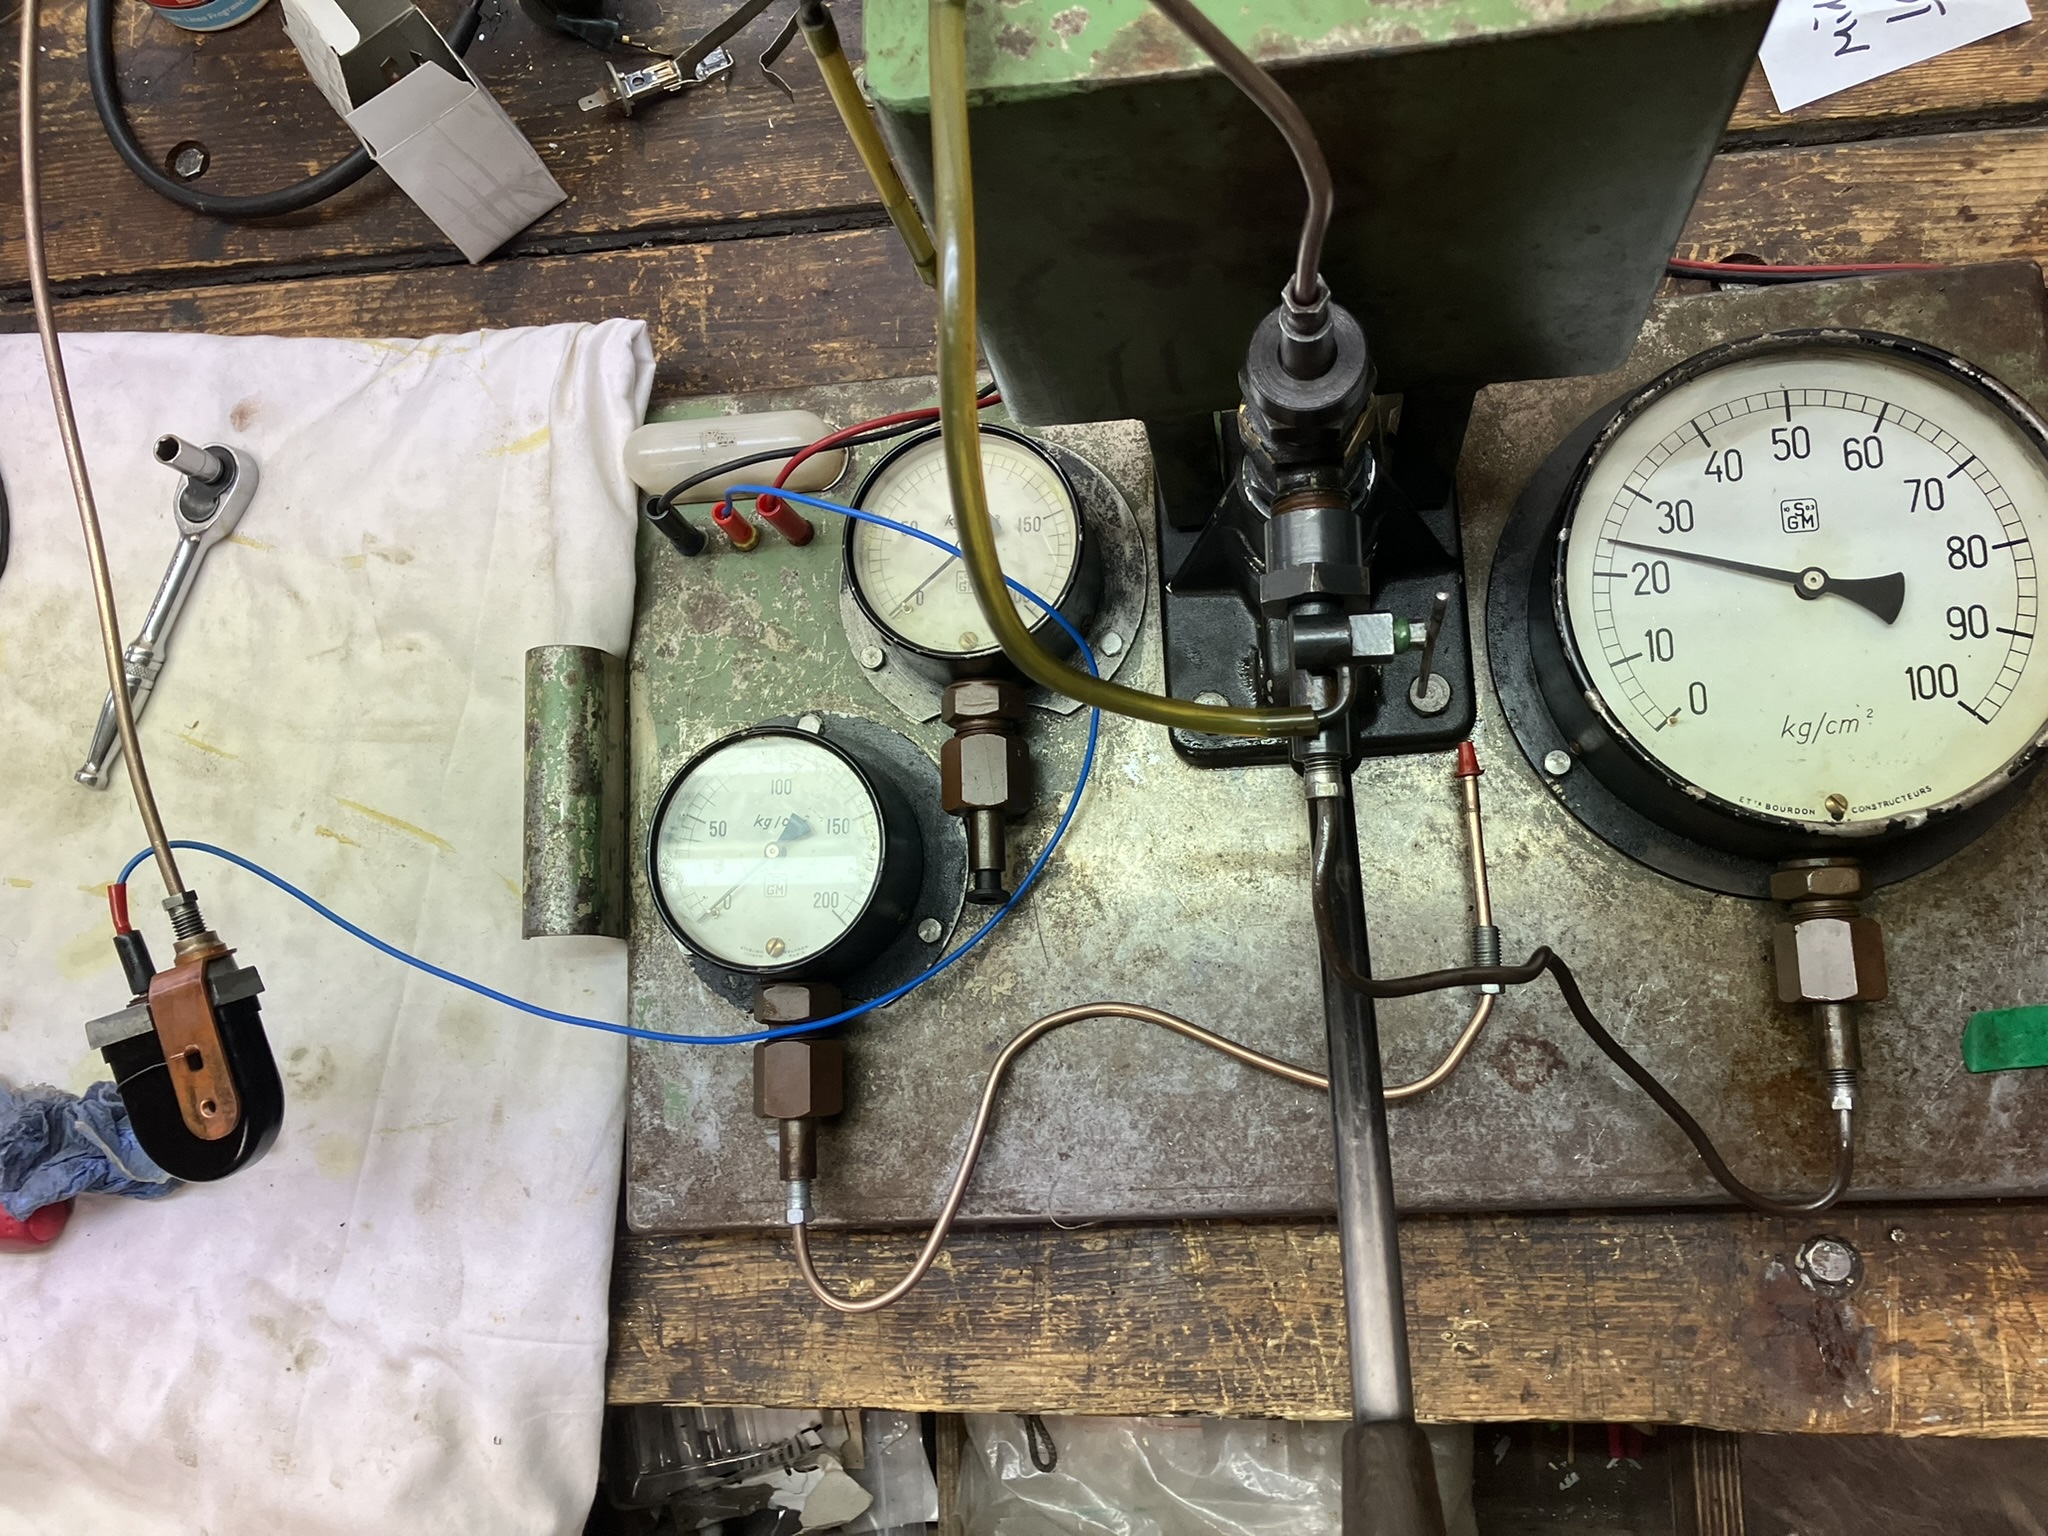
Citroen do NOT give instructions for recalibrating (though with pressure gauges it’s easy enough to do accurately) probably as it’s a safety device. Hence the wire seal. At least mine provides some kind of warning. I put the switch back on the car so i could continue road testing and the bloody thing isn’t working again! It looks like i will have to pull it off again at some point, break the seal and give it a good clean up. That alone might make it register within the correct range. if not, i can use my test bench to recalibrate it. But I’d still like a spare which – when tested – already worked in the correct range.
Today I spent the morning bleeding the brakes and am off for another test drive.
Hi
I got a pair of NOS Cibie headlights about five or six years ago, and I got a pair of NOS driving lights from Colin earlier this year.I think that, because i write a blog with a lot of detail, the assumption is that my work is immaculate (and that i know what i’m doing!). it’s not and i don’t! i’m pretty thorough (i think) but i cock things up. And have probably made mistakes that haven’t come back to bite me yet.
At the D rally two years ago, Olivier from French Classics brought along his newly restored 1969 US spec DS21 and it was a stunner. At that same rally, a guy turned up in a newly restored 1966 RHD DS21 and the work was brilliant. I put both of those above my work.
Thanks John. It’s not perfect and was never intended to be. I had a thought: we say “I’ve restored a car” but that can mean many things. It might mean someone’s done the work themselves or in many cases it can mean “i’ve given someone a blank cheque to make my car look like new again by replacing lots of parts”.
‘Restore’ can also have a very specific meaning to some people. Someone else used a different word the other day and in hindsight I think it applies to what i’ve been doing: I’ve ‘recommissioned’ my car. wherever i can, i’ve tried to reuse the parts that came off it and press them back into service. That means that some parts have battle scars, but i genuinely like that. Sure, i want it to look nice, but getting it back running mechanically has been the primary goal. I’m not a mechanic and i’ve never done this to a car so it’s been a huge learning curve. I’ve made mistakes but it’s still more DS than i ever had before – so it’s all positive (until it breaks down).
I plan to drive it often. i’m retired now (couldn’t fit in the time for work AND recommissioning) so have lots of opportunities to pul it out of the garage. I would like to take it back around France again. I’d love a frogeye car as well but couldn’t afford one, don’t have the storage space, it would stop me driving this car and i can’t afford the divorce.
Bits – no – nothing significant leftover. I sometimes spent days puzzling where a clip had come from and where it fitted back, just as i spent days hunting for a 1 inch piece of rubber i’d misfiled. And i spent weeks working out how all the hydraulic pipes fitted back together. having said i tried to re-use everything, i also bought bits along the way ‘just in case’ so i have a few spare things living on shelves. And will probably buy more!
Hi Paul
Can you shed a little more light on how you converted the lamps from white to yellow – pun intended.
This is something I would be interested in doing myself.Hi Colin
As you know – but others may not – this relates to the smaller long range/ swivelling lights on a DS. First thing to say is that my lights are Cibies. I’ve got a pair of Marchal yellow domes and they fit in the Marchal reflectors in exactly the same way. I haven’t tested to see if they would fit a Cibie reflector. you can buy yellow H1s that fit straight into a standard light unit, which saves all this messing about but i wanted to use yellow glass domes as originally fitted to my car.
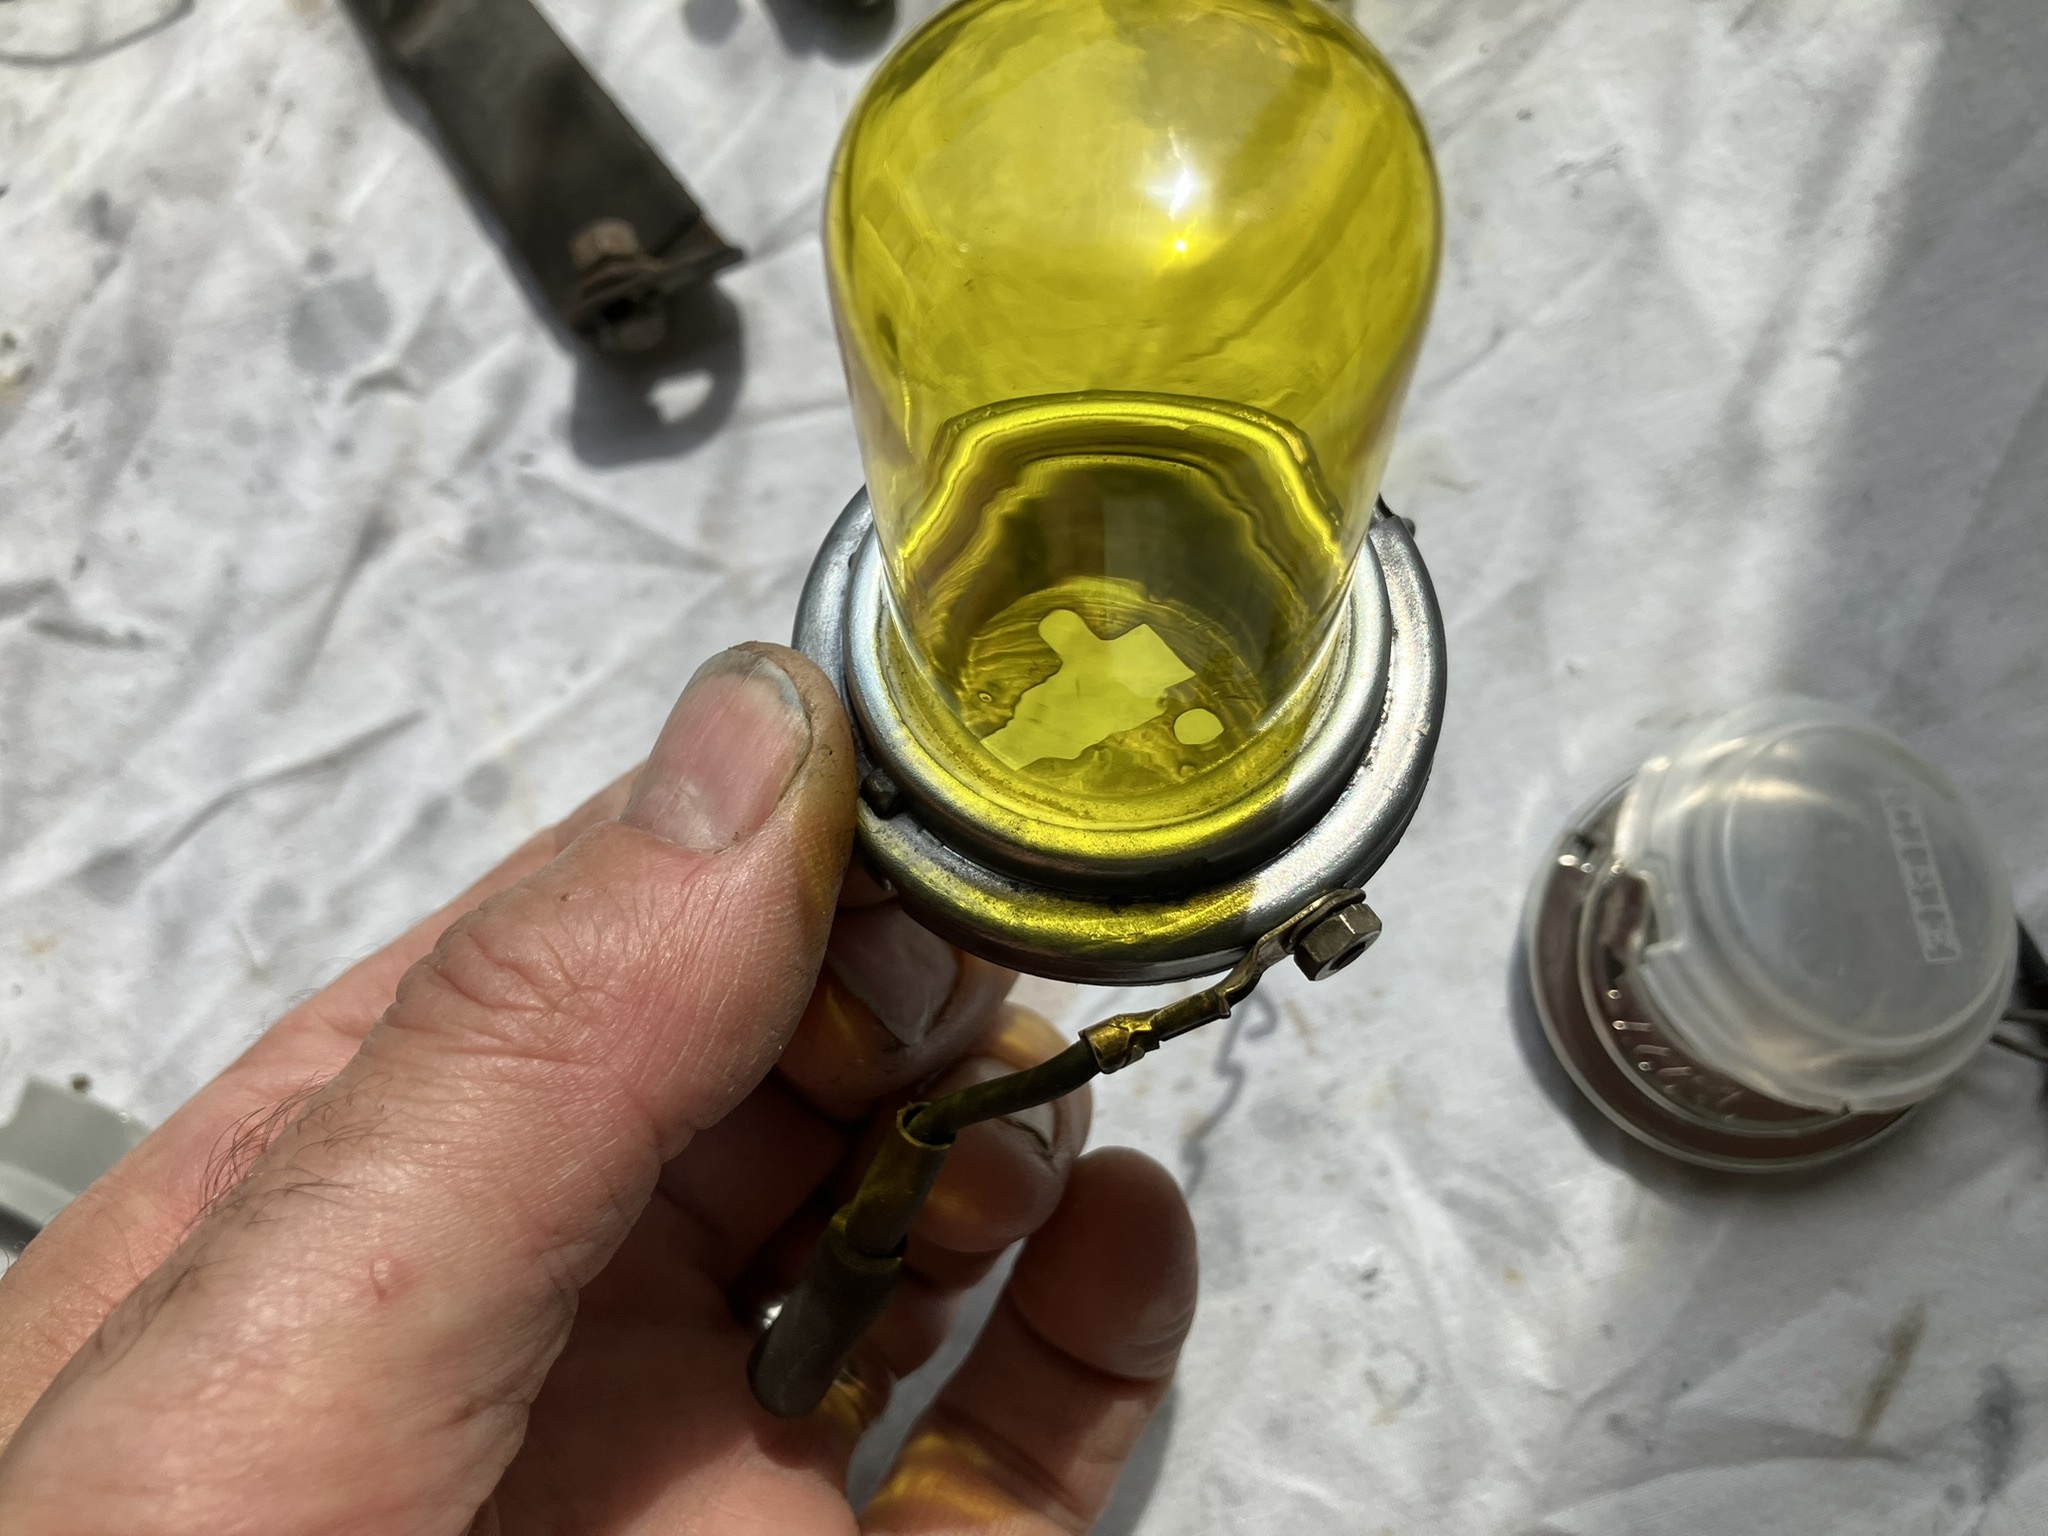
This is how I went about it.the bulb mounts are pressed into the back end of the reflector. I removed the plain mount for the H1 bulbs, and replaced them with mounts that have yellow glass domes over them (that i already had on my old rusted lights). That way, you still just fit a white H1 bulb but get yellow light.
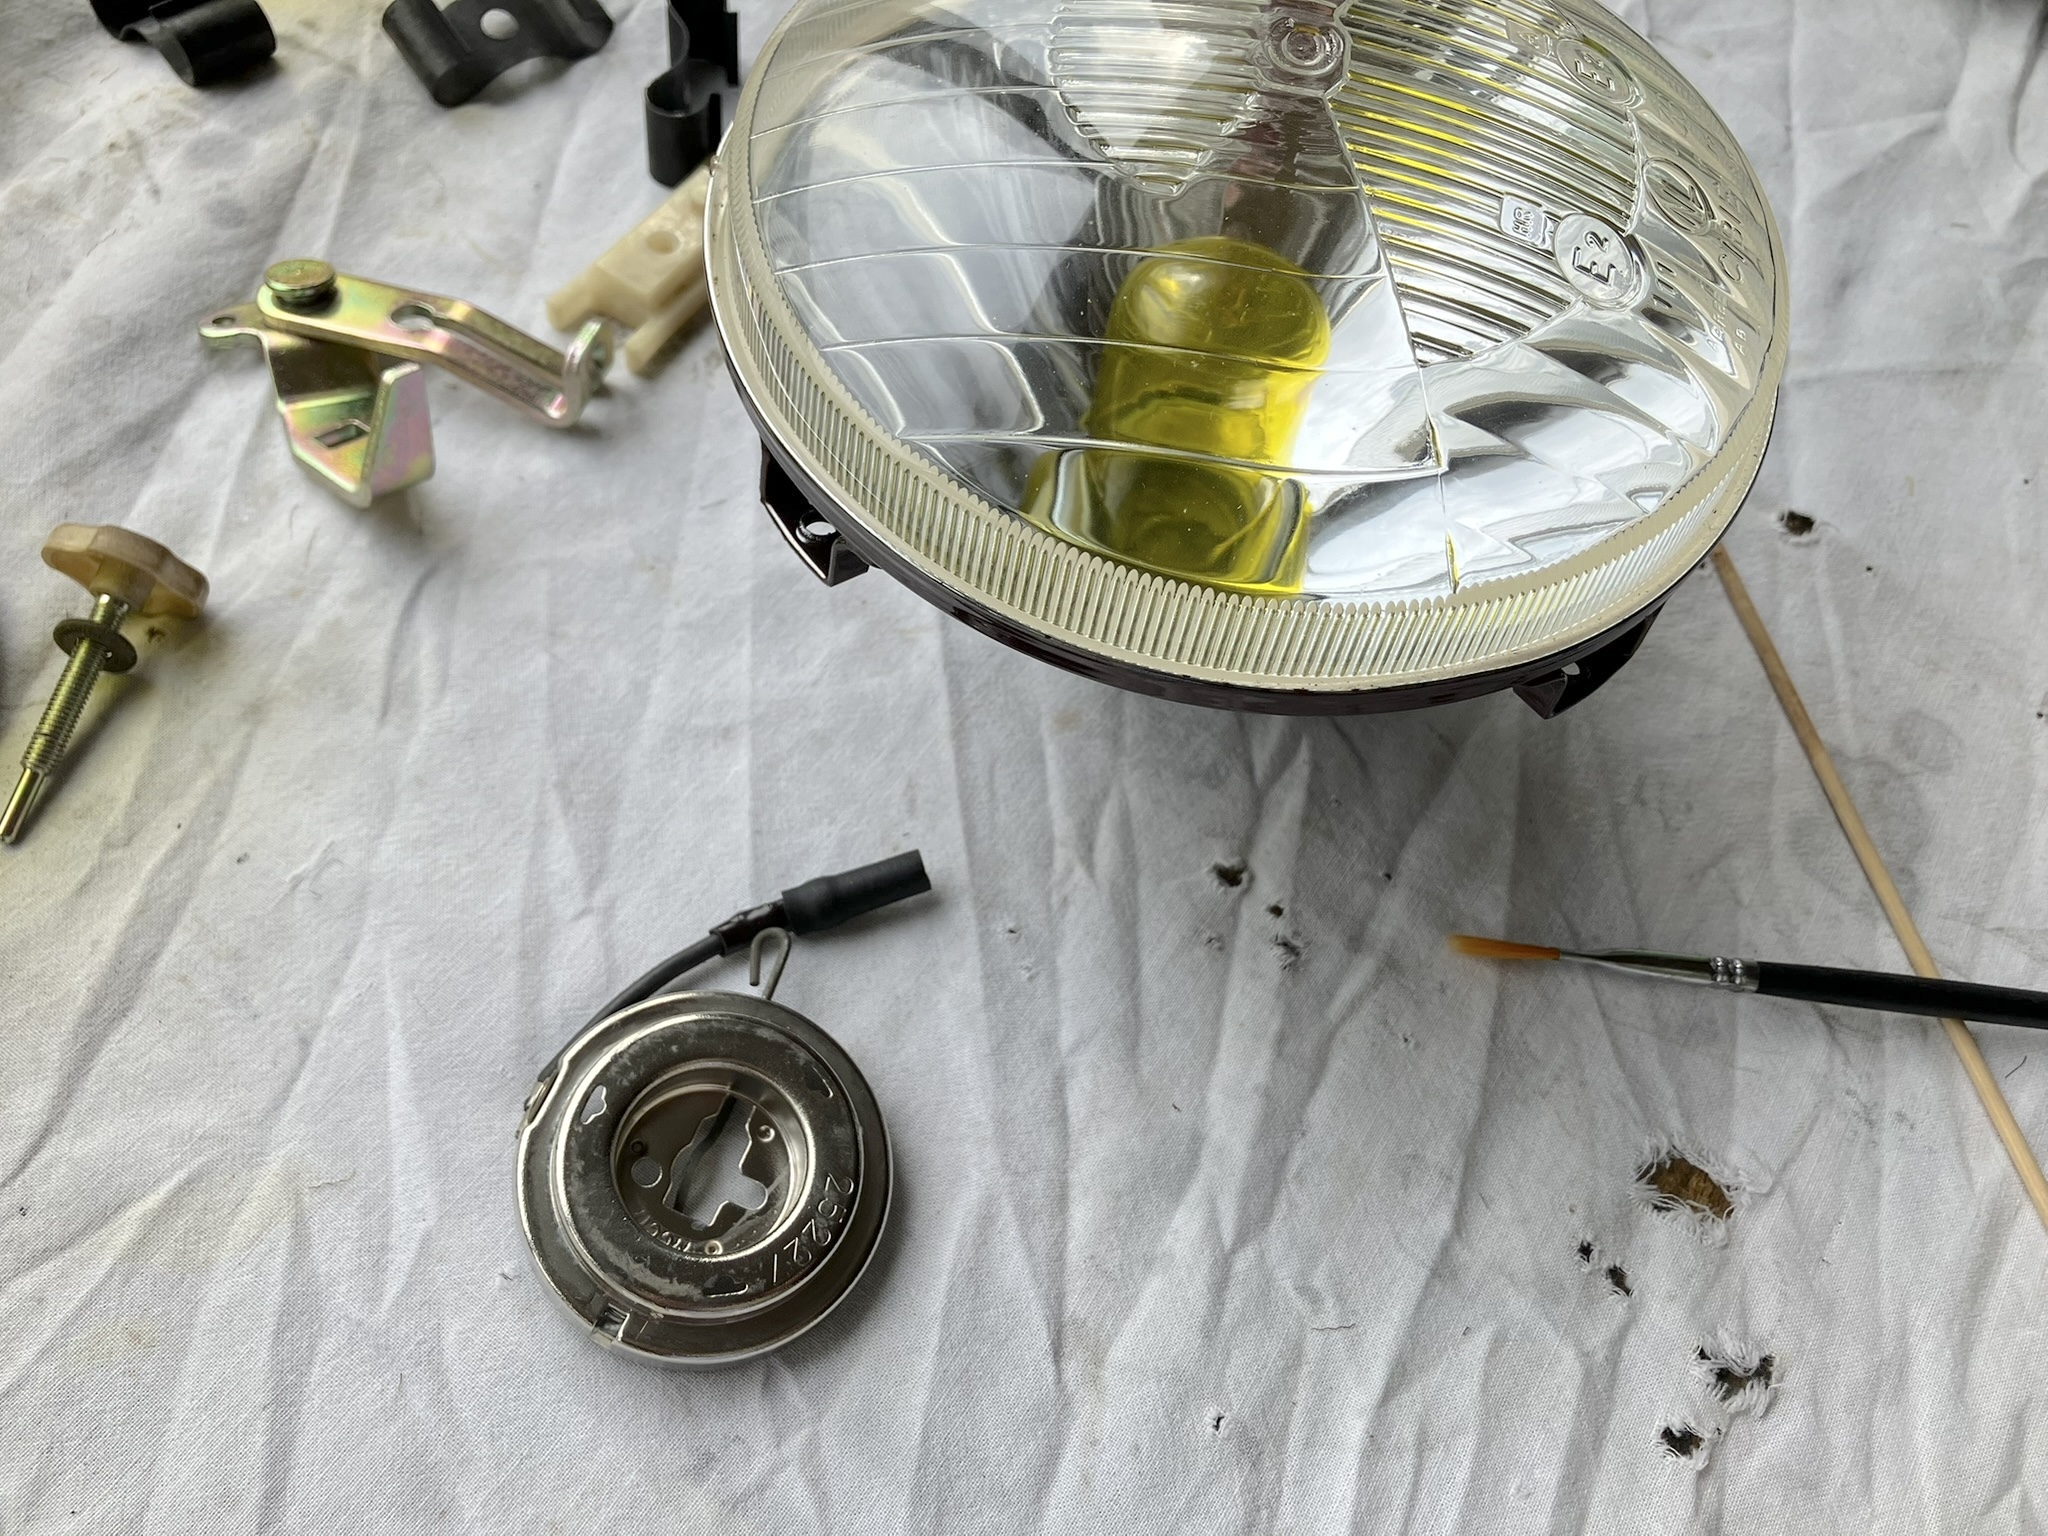
The bulb mount has a tab that locates in a slot around the edge of the reflector body – that is to correctly orientate the rotational position of the mount (and so H1 bulb) relative to the reflector.
To stop the mount pulling out of the back of the reflector, the factory press three or four small sharp ‘dinks’ in around the circumference of the mount/ reflector join. These essentially pin the two together using their own metal. With a combination of tab and dinks, they cant twist and they won’t fall out.
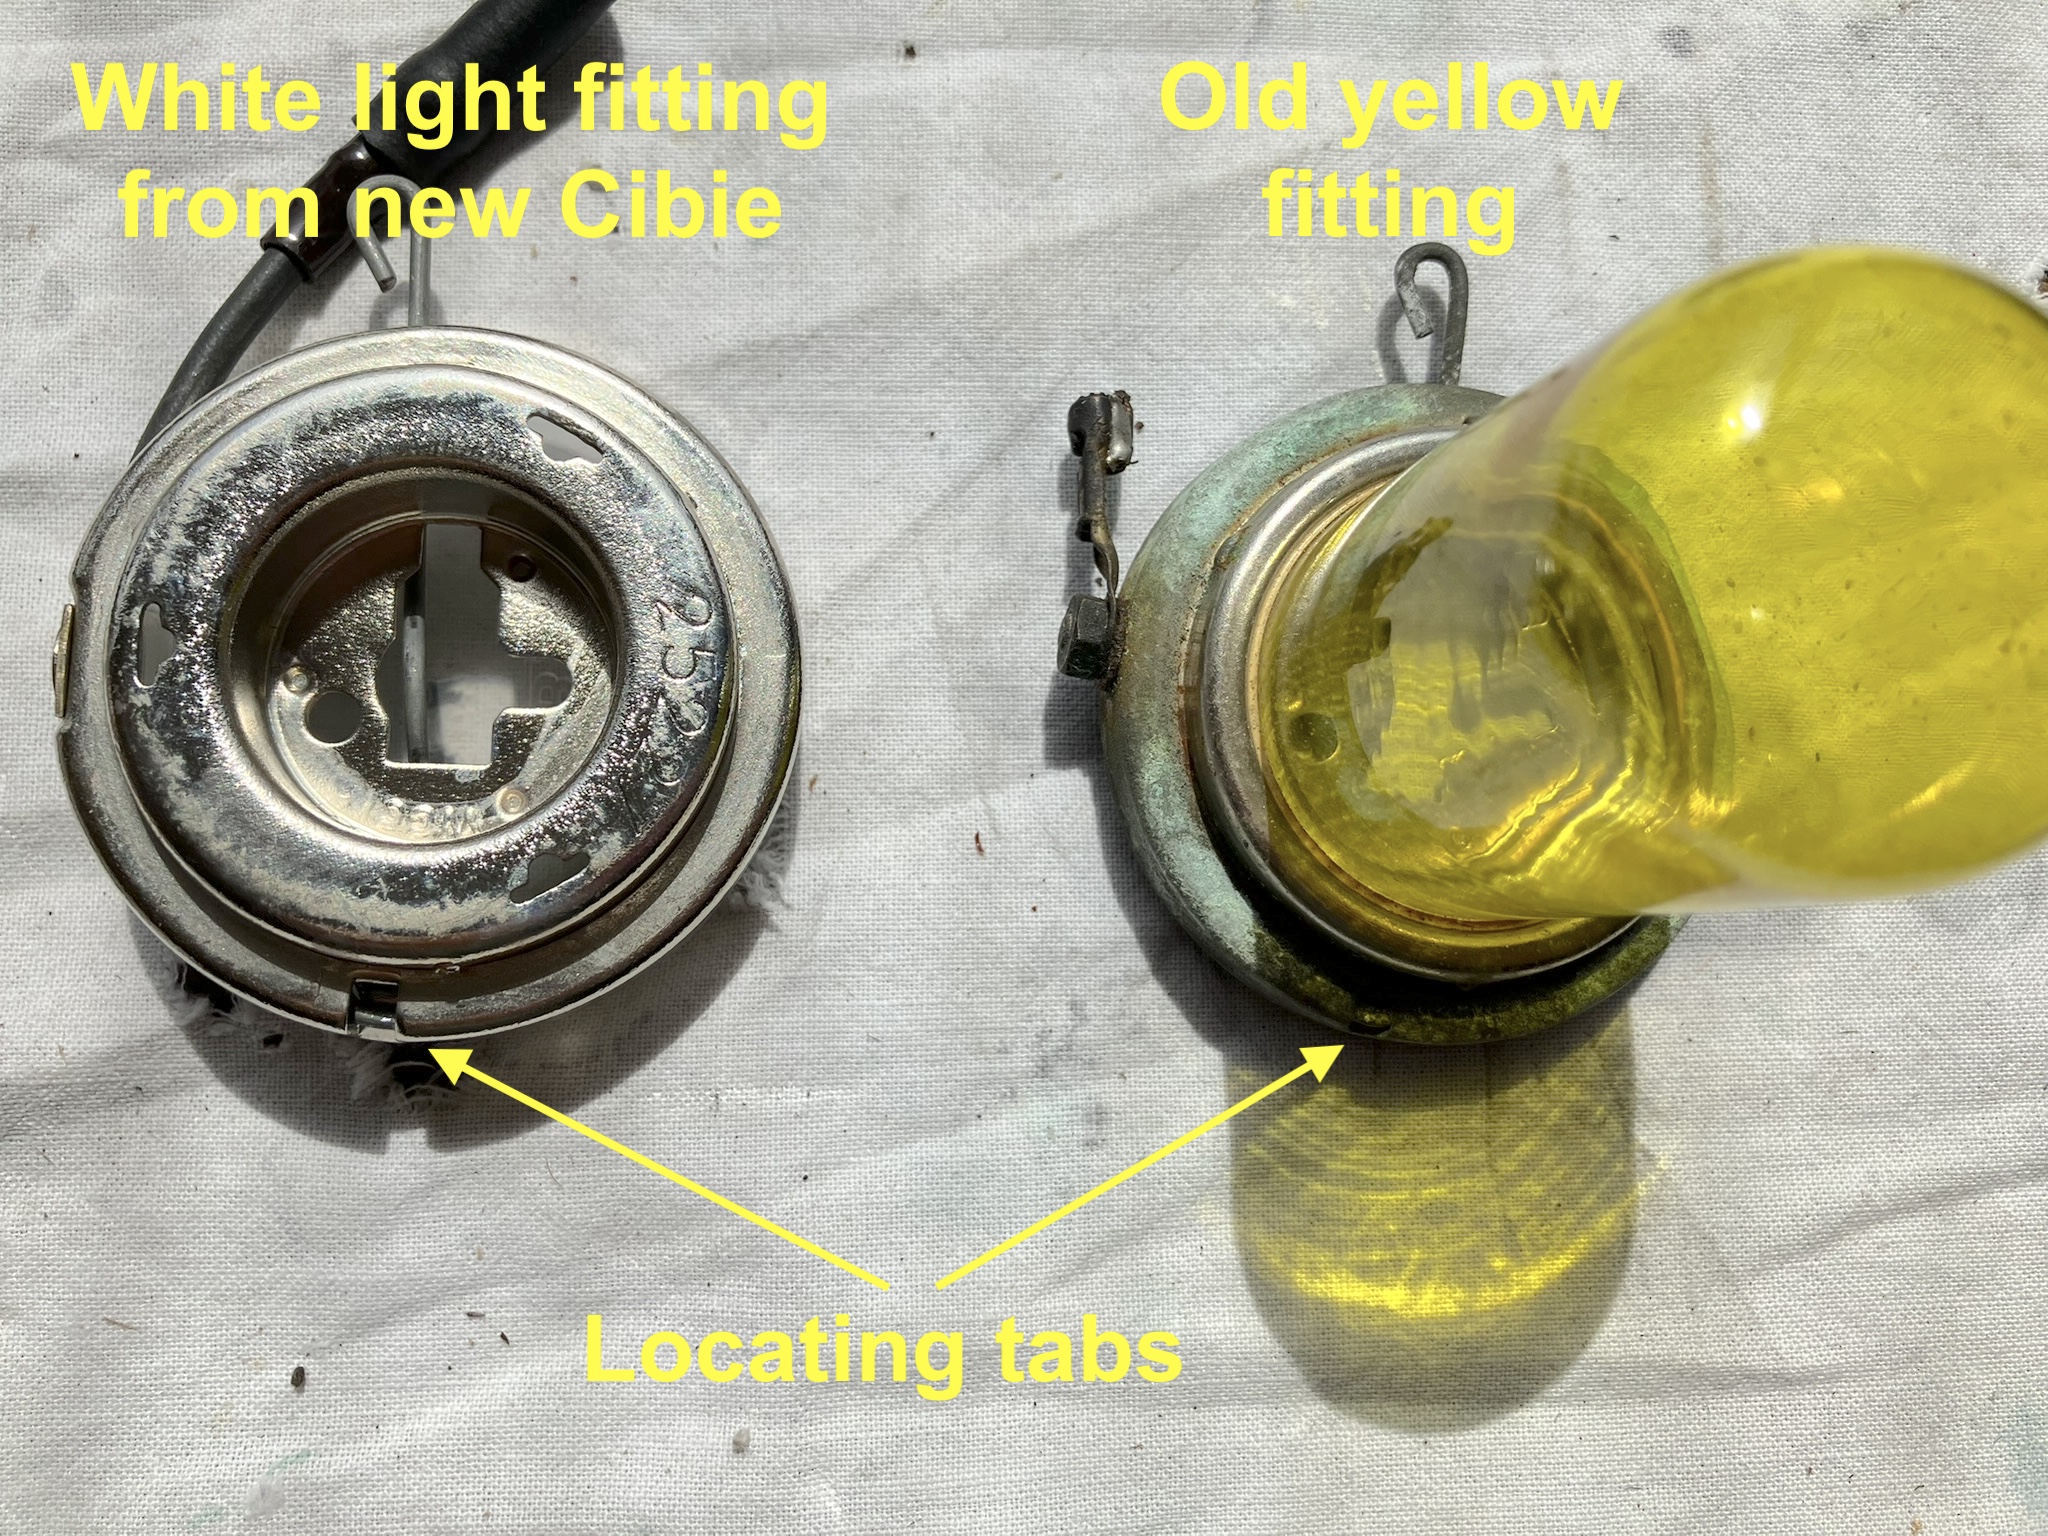

To get the old mounts out, i used needle nose pliers with very pinched ends that came to a tip to compress and so loosen the dinks. it’s barely effective but works well enough to loosen the grip so that you can then wiggle the mount straight out of the back of the reflector. I found that getting a thin blade in the gap between reflector and mount helped to lever them out a little and break the grip of the dinks.
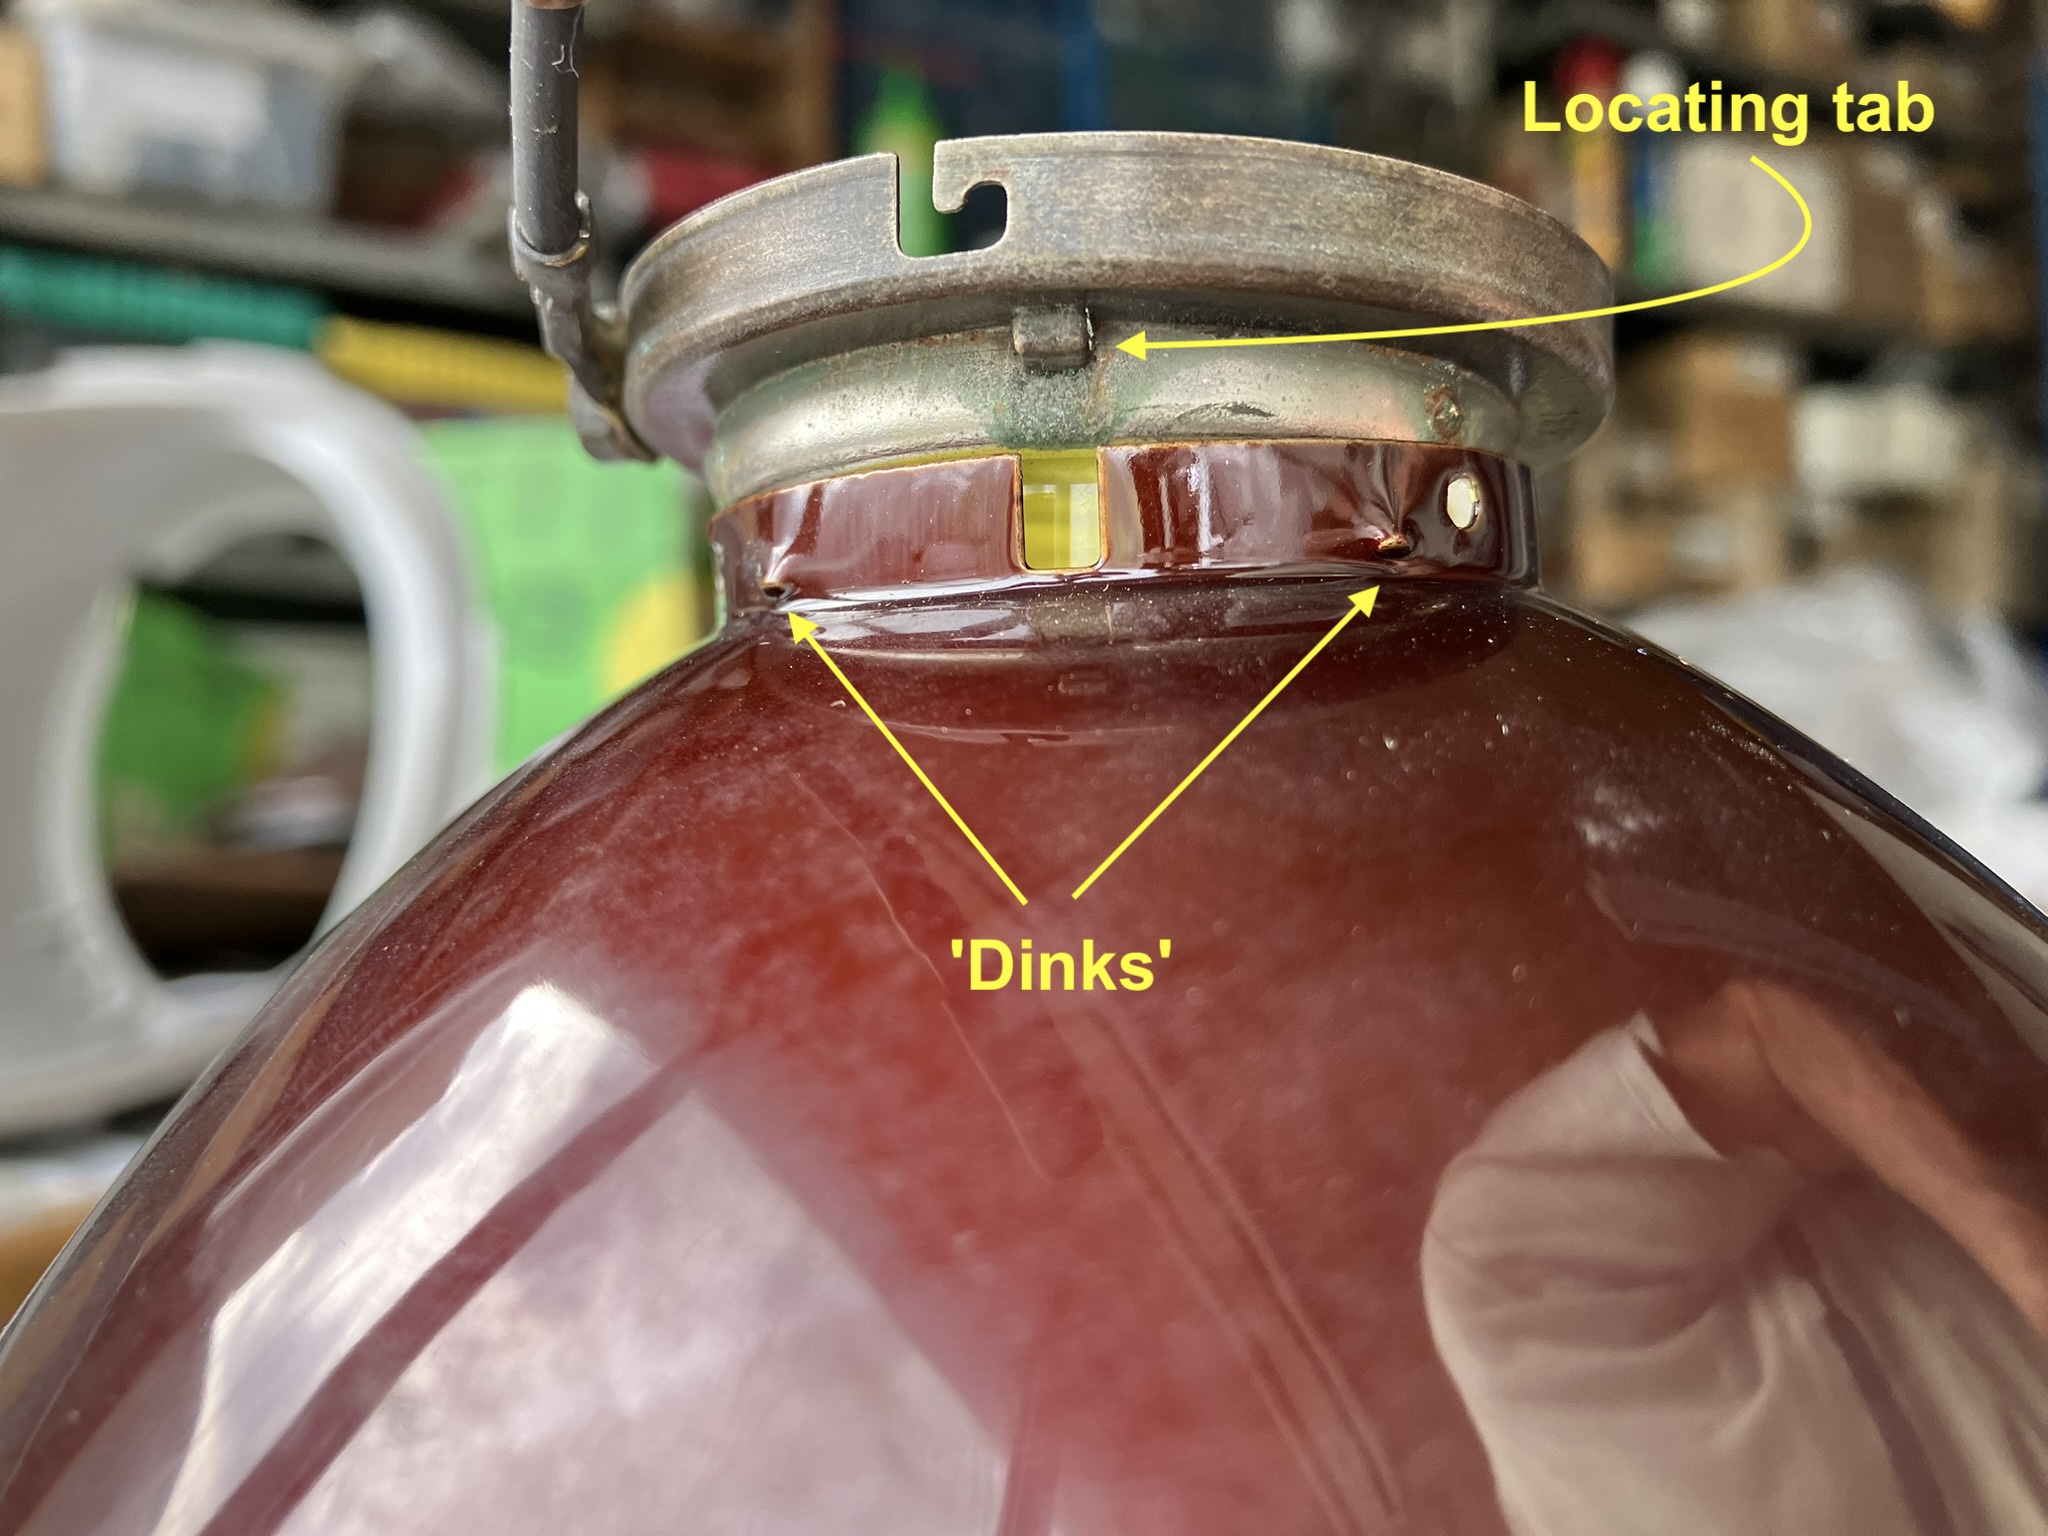
With the old mount removed, the yellow dome mount just pushed on/ in: I lined up the tab with the slot, put it mount side down and tn gently pressed down on the reflector glass to push the mount home and there was enough grip left in the dinks to hold the mount in the reflector.
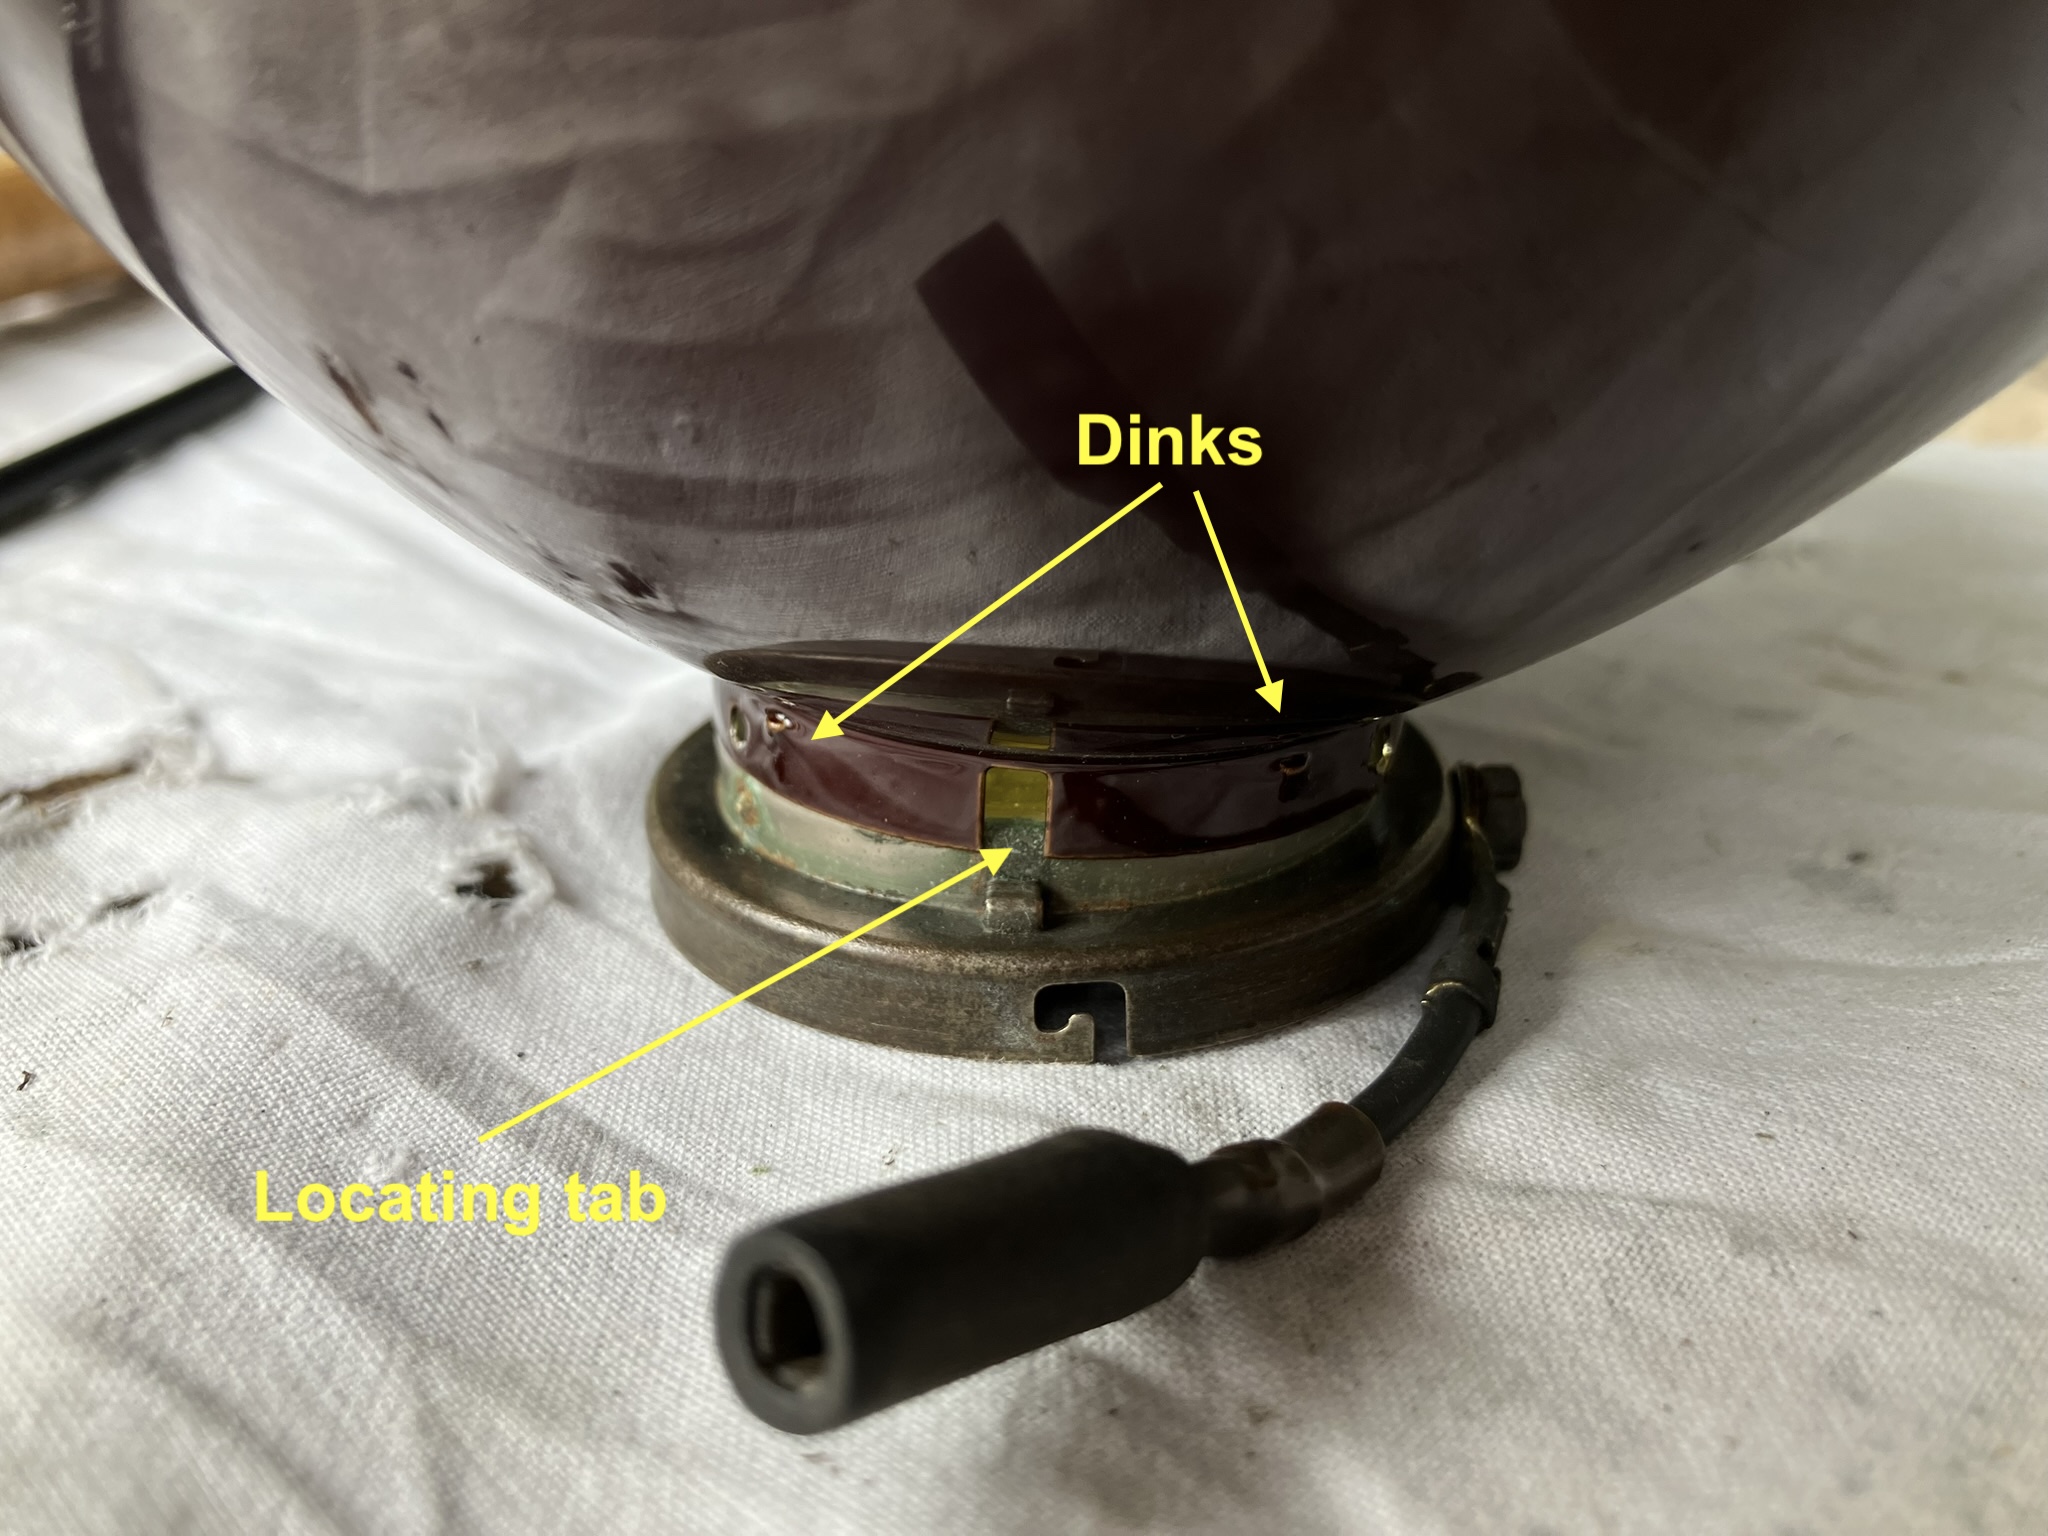
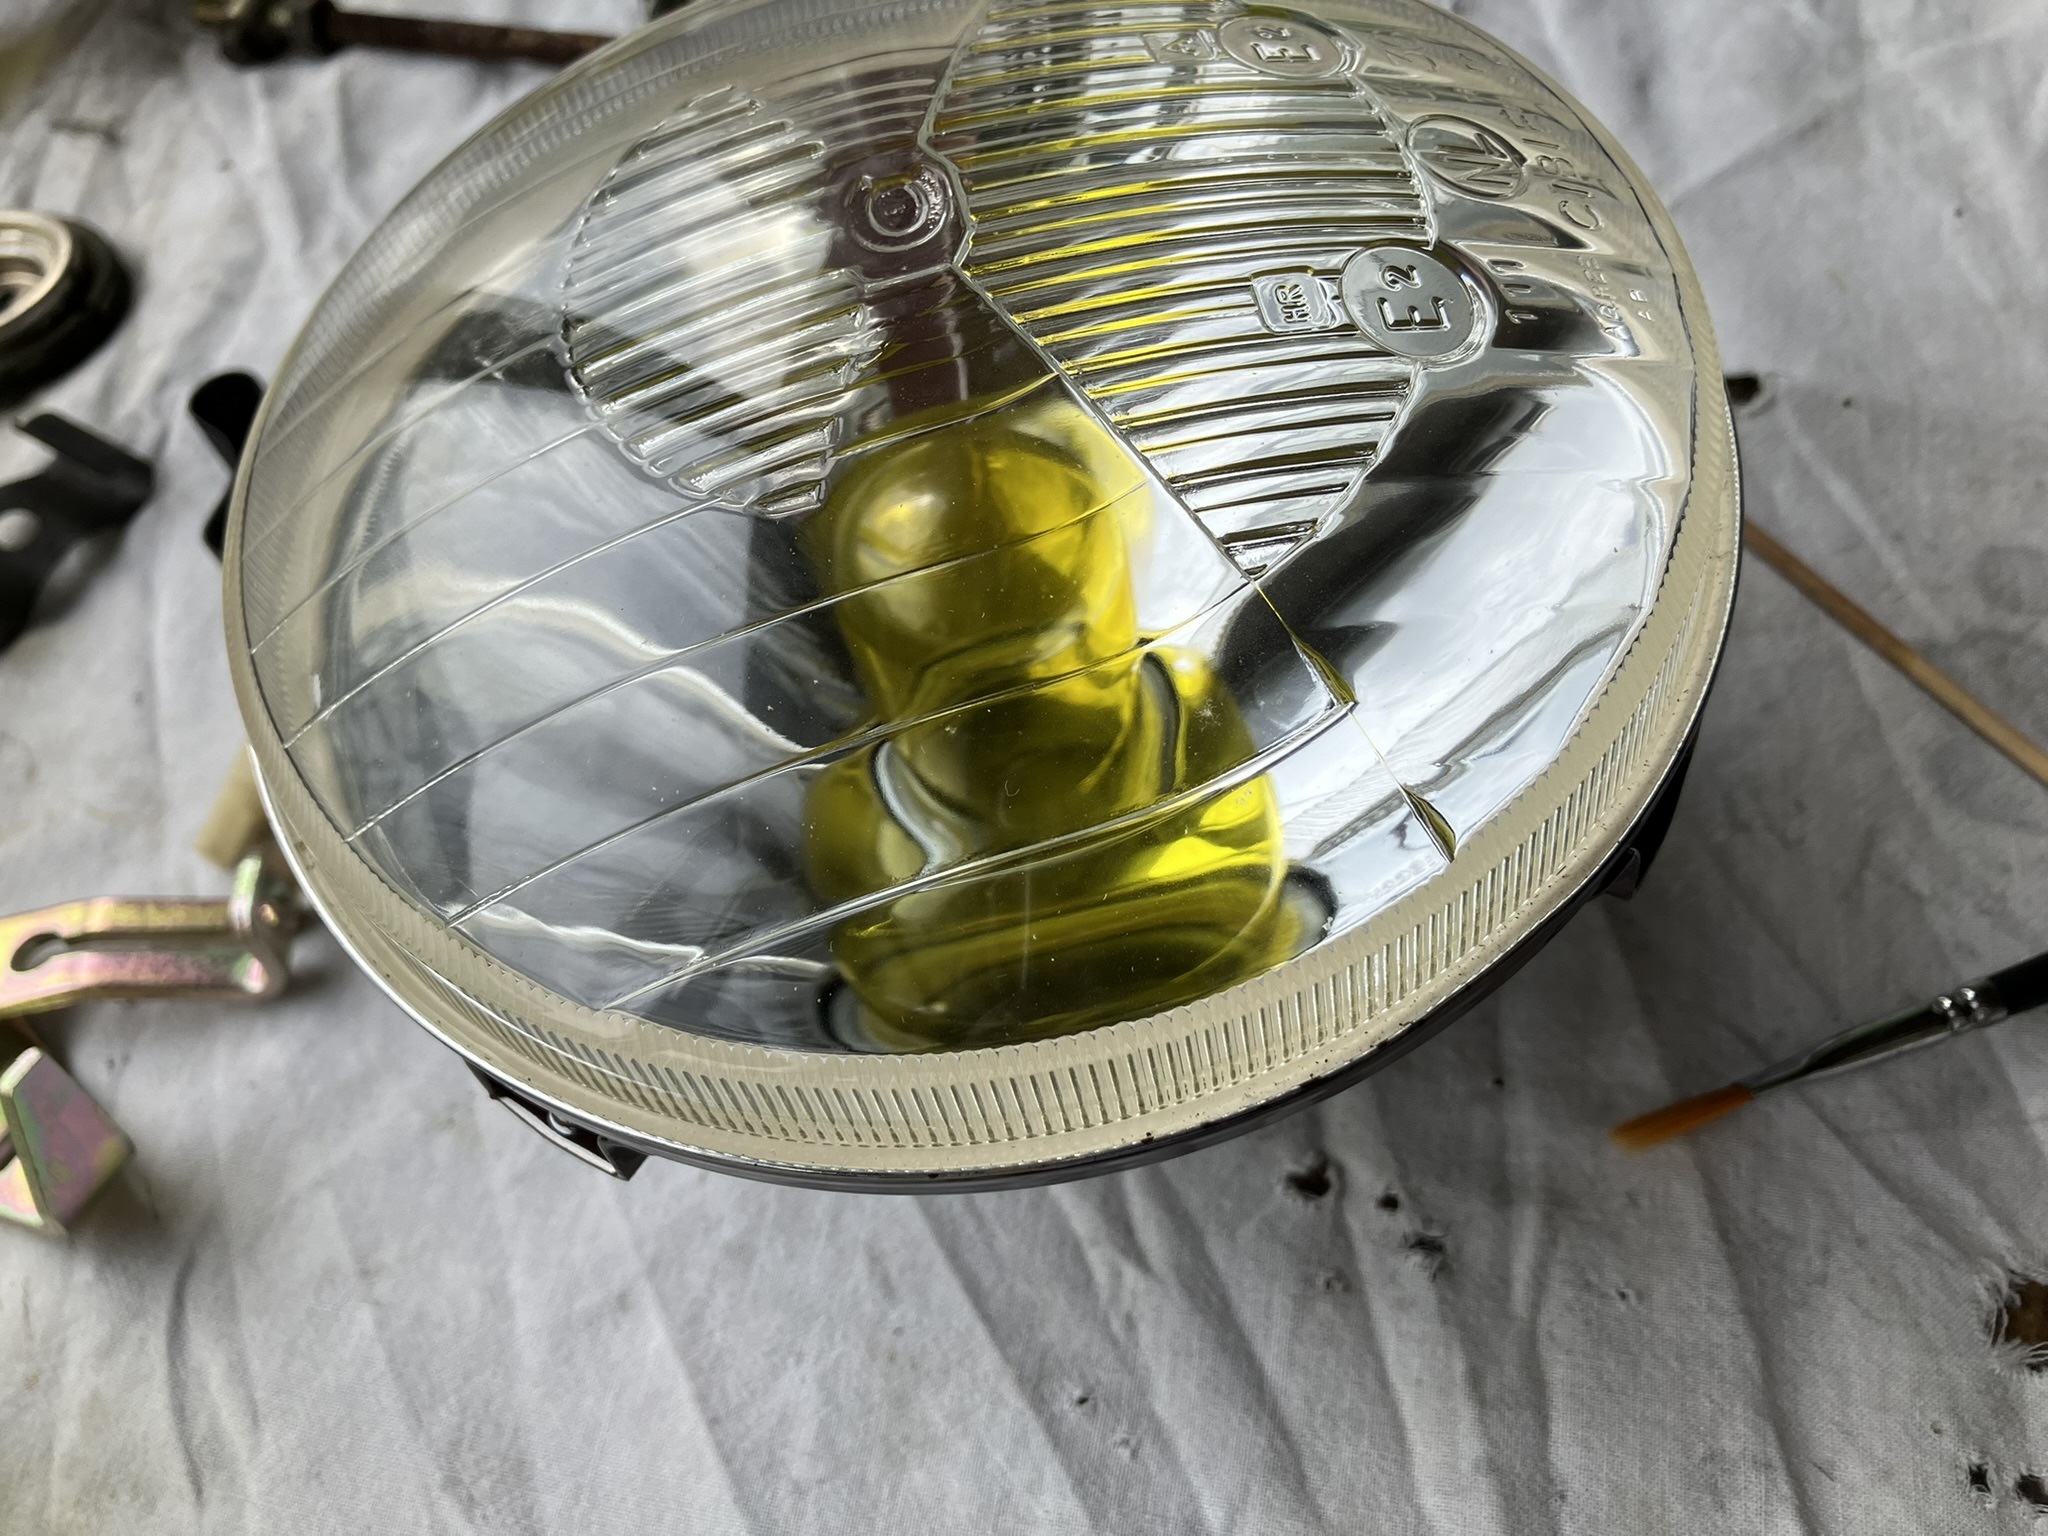
The real challenge is finding the yellow domes in the first place. The yellow glass is as thin as the glass on a bulb. One of my yellow glasses was cracked and i bought several tatty Cibie lights off Facebook simply because i could see they had the yellow domes on them. Even then, there is a risk of finding the glass is cracked. they sometimes pop up on the sasses site, otherwise someone like Mark Rueneuf is a better bet but even he rarely has them.
When seen on the front of the car, the yellow bulb holders make the car look 6.2% ‘more French’ but probably reduce the effectiveness of the lights by 6.3% 🙂
Thank you. I hope you won’t be disappointed. It won’t be concourse.That was never the plan.
Thank you. the gaps were great after the car was painted. Then I took off the doors and bonnet to build them up…. The gaps are still generally good but need sorting.
I’ve just spent a day fitting the Pallas door trim, then discovered it catches on the doors and wings because of the gap size. so I’ve just spent ANOTHER day taking itt off and repositioning it – including shifting one of the doors.
I’ll put ‘gapping’ down on my ‘to do’ list.
Thank you. I took lots of reference photos to help my rebuild and accessed a few blogs – then put the two together and started my own blog. If I thought my blog had encouraged and helped a few people (as those other blogs encouraged me) to get stuck in and tackle jobs on their own cars then I’d be doubly pleased.
Thank you Julian. That’s embarrassingly generous of you.
I’ve often said that my aim has never been to re-create a concourse car by simply shoving on loads of repro parts. The car will go downhill. All i’ve tried to do is to raise it to an initial position/ standard that makes that a longer decline 🙂 I have fag-burnt carpets, dents on the sills and on the bumper and cracked leather. but i feel a car that’s nearly 60 is entitled to those battle scars and – if I may say so – looks like the historical vehicle the log book says it is.From my perspective, there are people out there quietly doing some great work on Ds. Perhaps i only come into focus because i write a blog about the journey. And maybe because i’m just an owner-driver, not a mechanic. Anyway, the proof of the pudding will be in the driving and i’m really looking forward to that.
Here’s an under-bonnet photo from September 2026, and a link to one of my posts with a video of how it was went i first went back to it in September 2014.
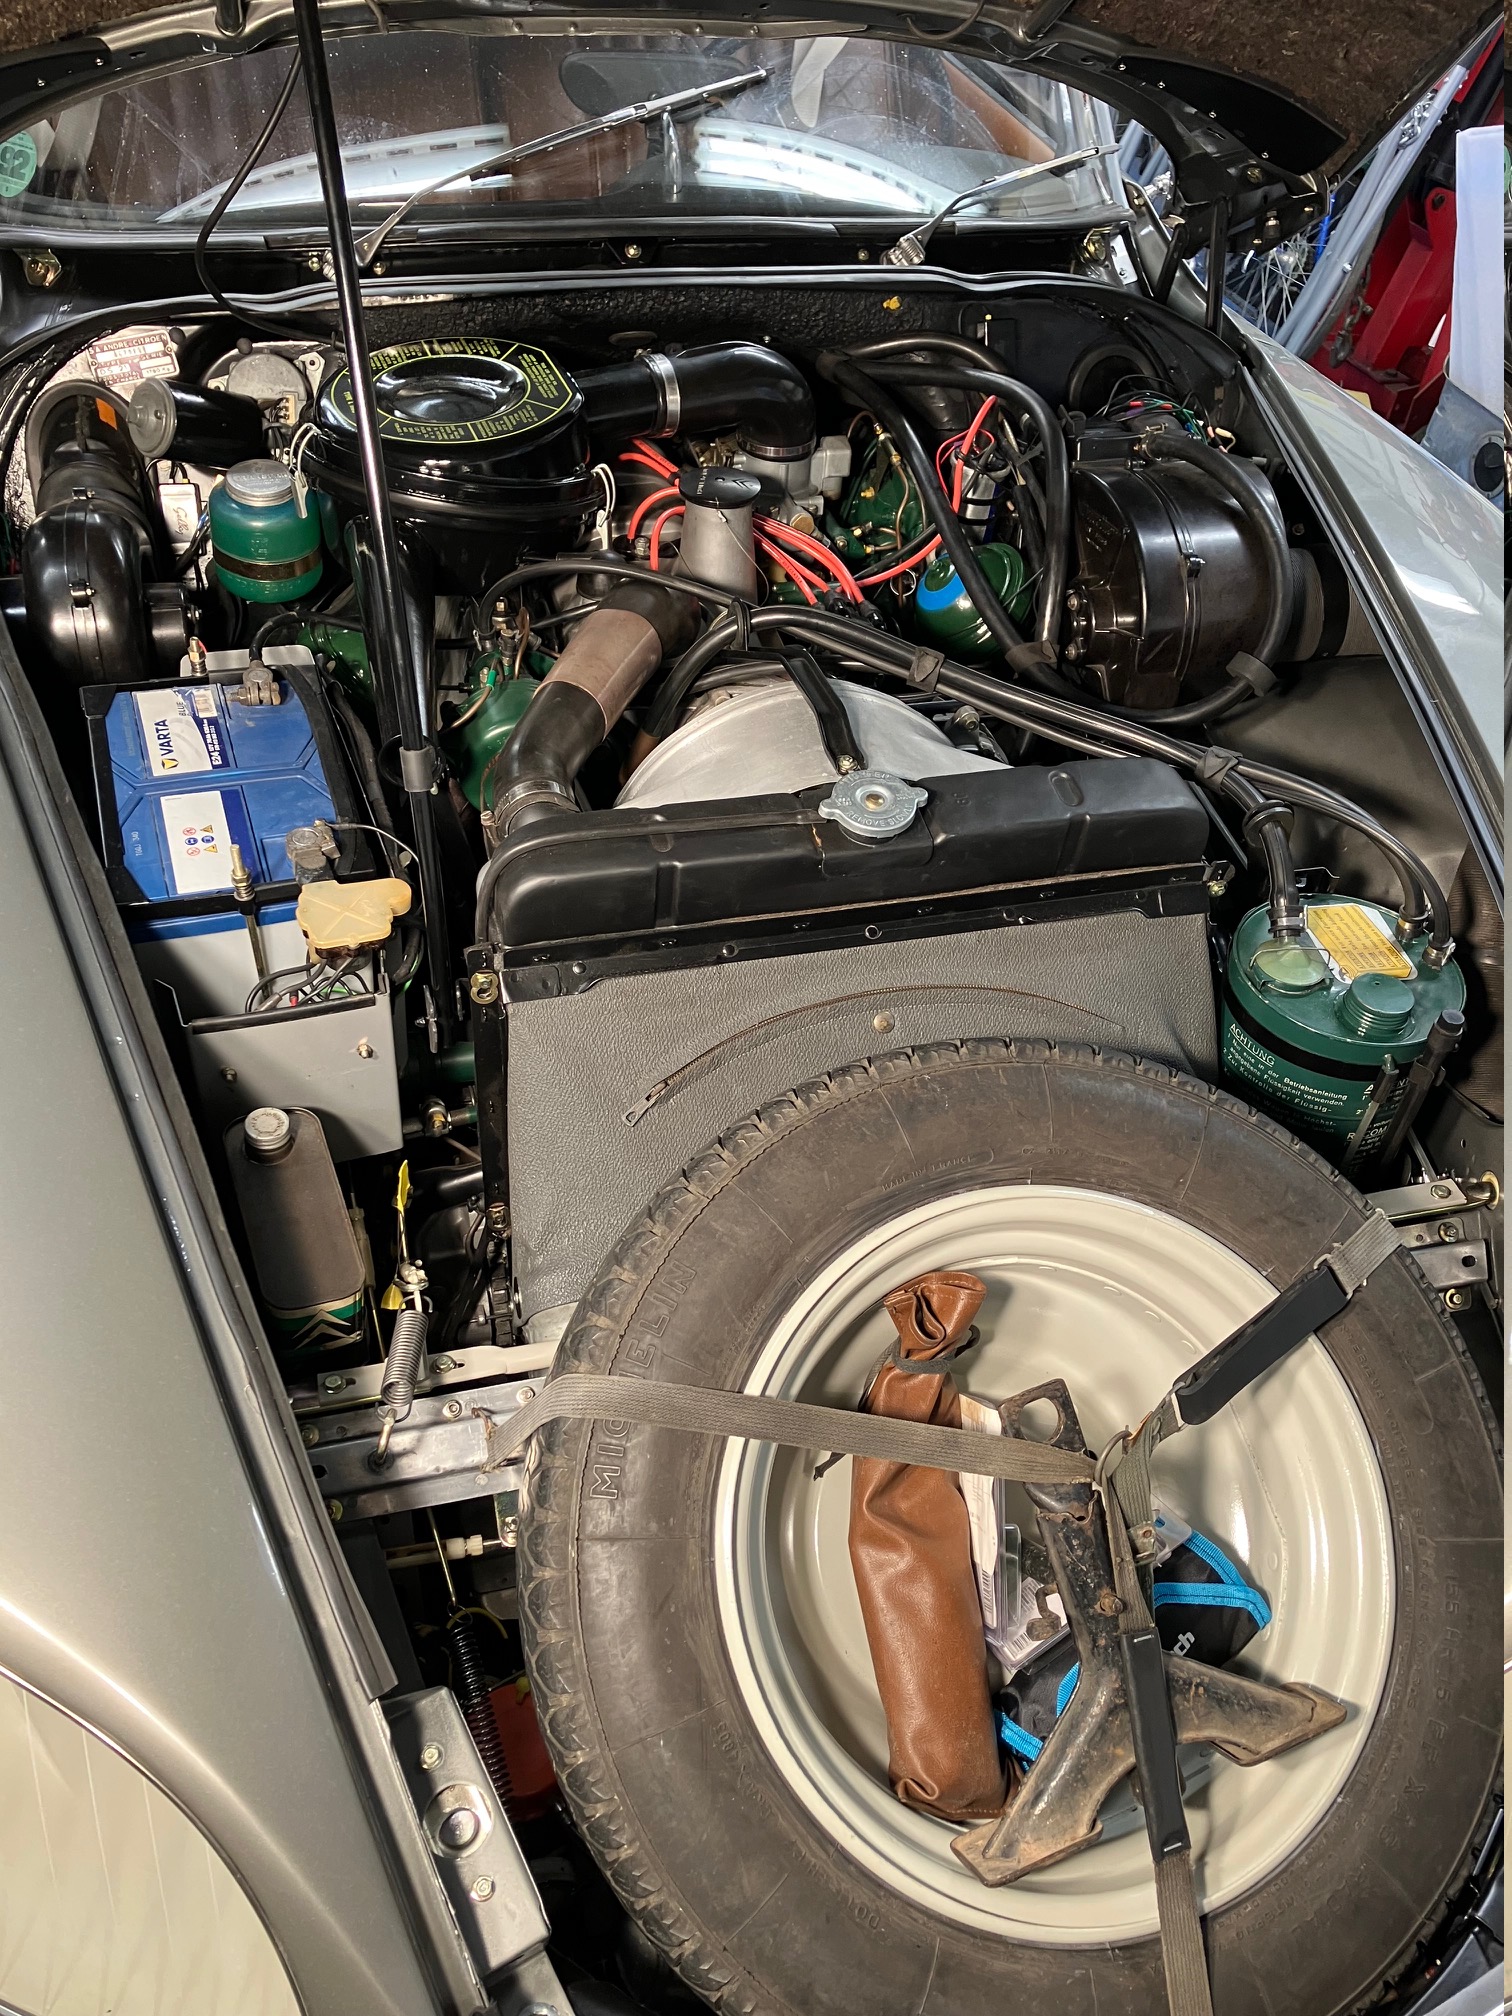
https://ds-restoration.blogspot.com/2018/04/resurrection_1.html
Hi
I did this job a couple of weeks ago. This parts drawing might help.

This is what you should have under each plastic light pod.
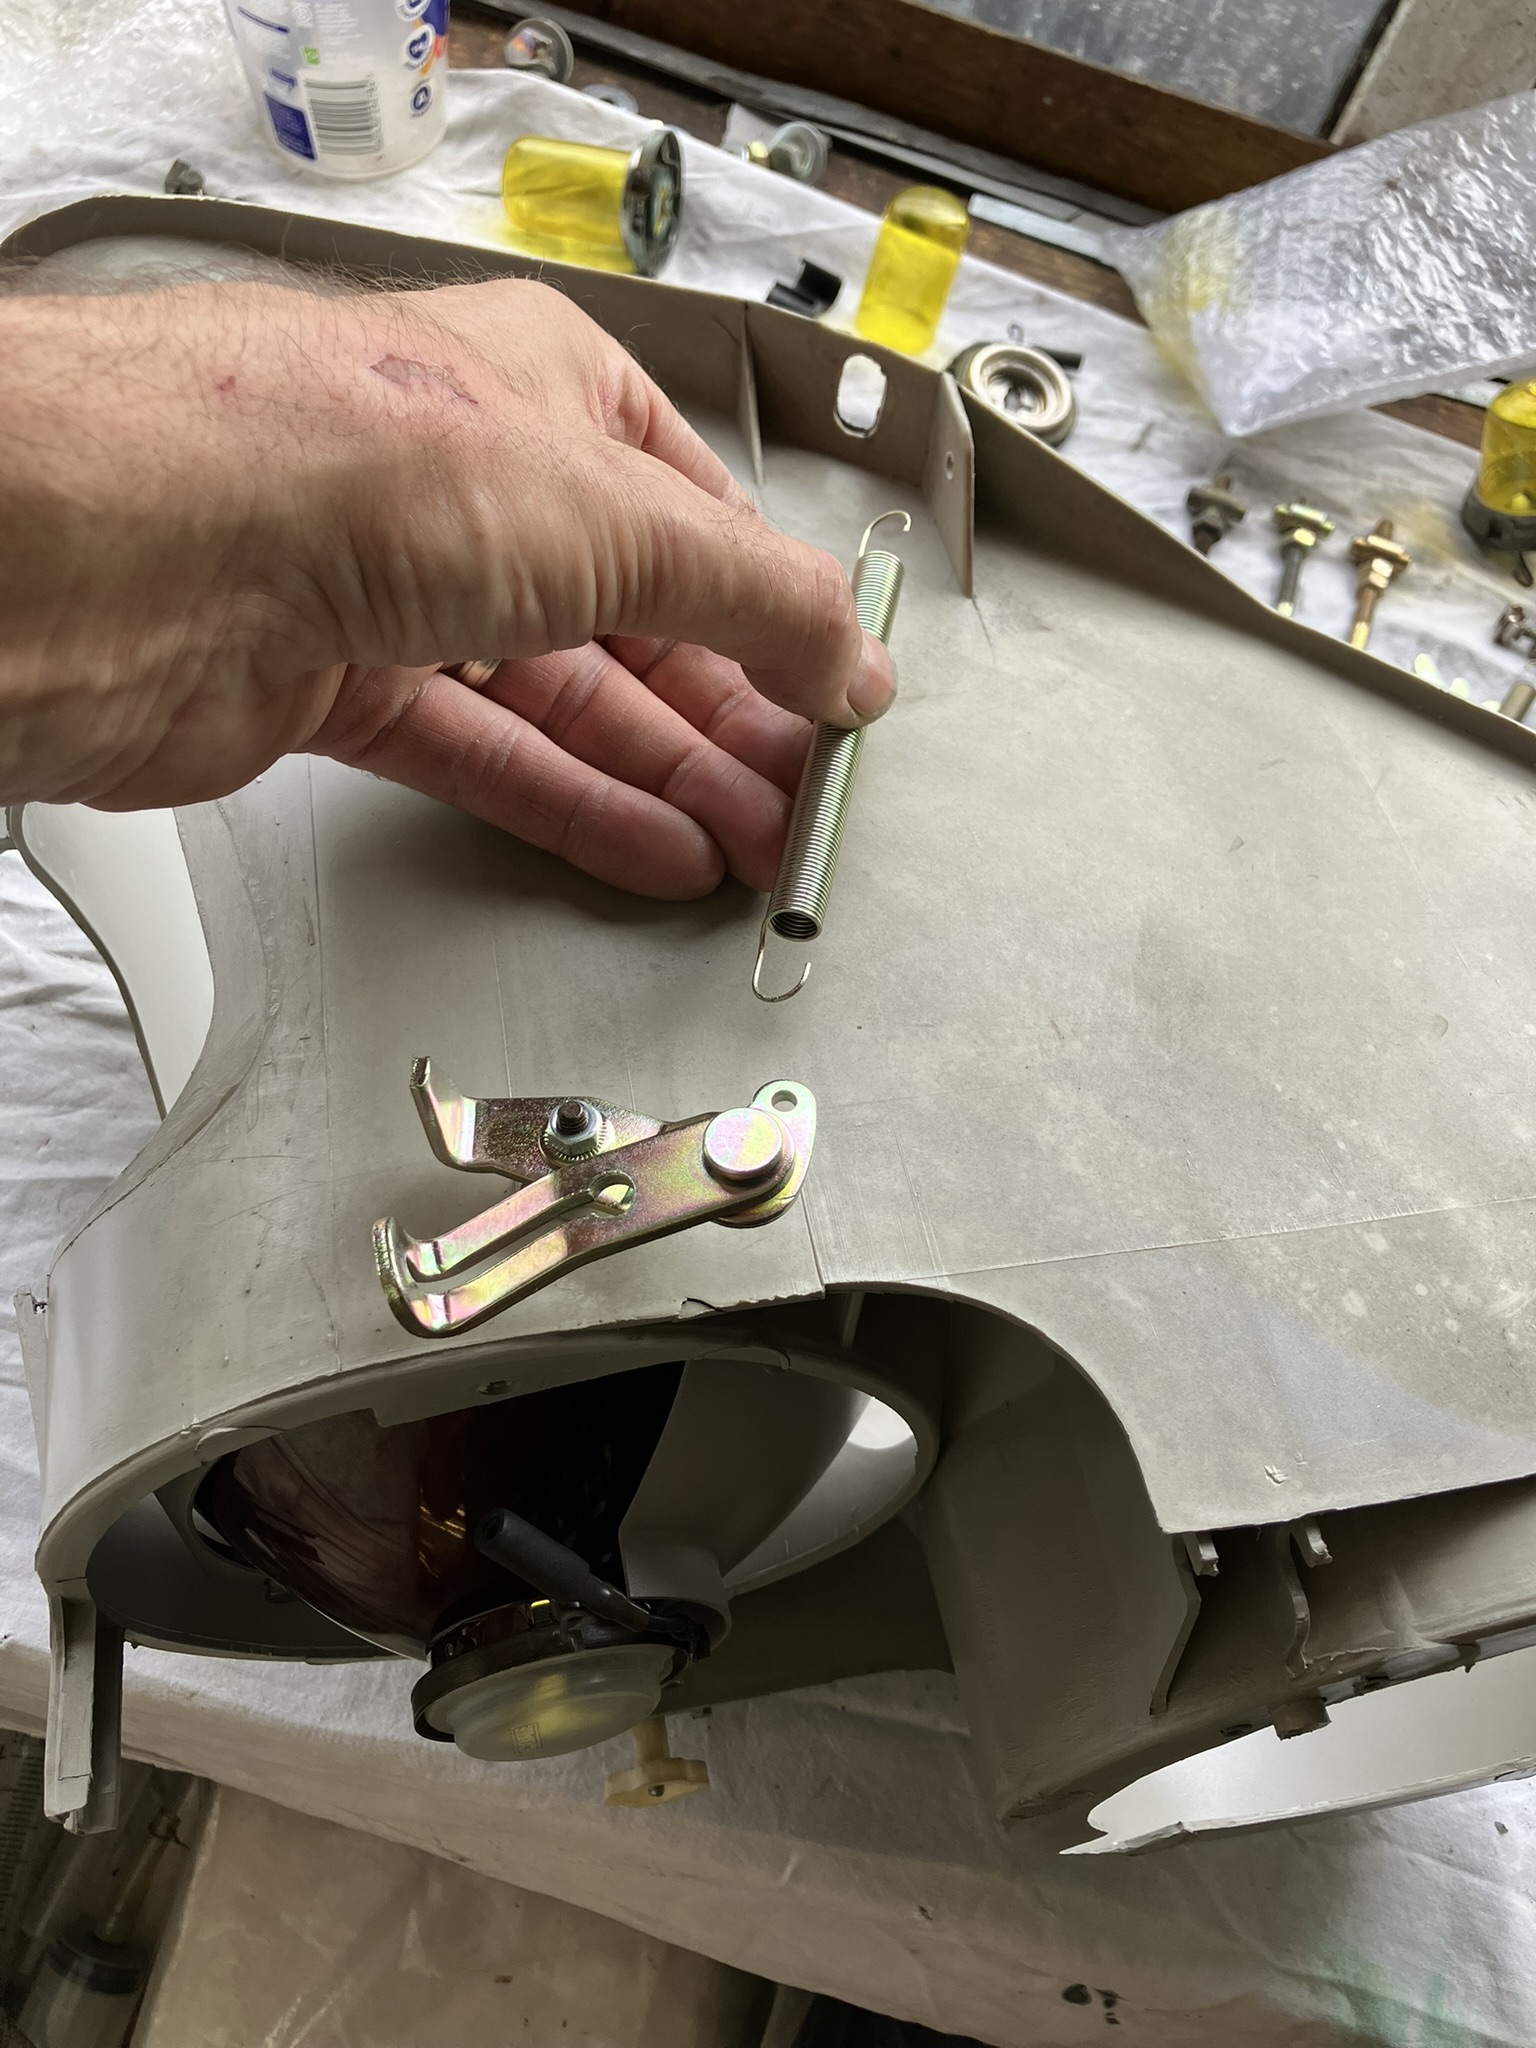
The ends of the long and short wires/ cables you can see when you take the spare wheel out, clip into the slots of the brackets under the lights. The spring in the photo (one one each pod, provide some resistance and limit to the turning motion. the actual turning is controlled by the stiff hooked rod connected to the steering relay at the rack. Possibly the rod you’re referring to? (Parts 4,5,12 and 13 in the drawing above?)
Thanks Colin. I converted them from ‘white light’ to yellow. They still take standard white light H4s, but the lamps have yellow covers inside them.
Thank you Chris. There were times when i looked at the car in it’s worst state and could not ever imagine getting it back on the road. I seemed to spend years removing, cleaning, fixing and painting parts but then one day i found i was starting to put bits back on – and that gave me a lift.
If they are new to your car, then if it’s convenient (if you can find a tyre place that can handle centre hole wheels) i would get them checkout out for peace of mind. Partly to make sure they’re balanced and partly to make sure they run true.
Short term it will be fine but worth getting it looked at. Some people add ‘dyna-beads’ inside the inner tubes instead.
Have you just started to get vibrations? Have you checked the tyres for splits or bulging? Wheel nuts tight? You could try taking the wheels off and either swapping sides or rotating them to a different position – if only to see if there is a difference. I had a high speed front wheel blow out in a DS. Quite scary (though a D is probably one of the best cars to be having that kind of emergency in). Left me with a damaged wing, lost hubcap and urine stain on the drivers seat 🙂
Hi Steve.
I recently bought some Michelins for my DS at Longstones. Longstones are up between leeds and Sheffield. from where I am, that’s pretty north, if a little east. I’m sure they’d balance your wheels even if the tyre’s weren’t from them.
Alternatively, contact the CCCs Northern section. Colin Smith is Chair and a DS owner and may see this thread. if not, his phone number will be in the back of the Citroenian. Also in the back of the Citroenian is a number for David Joyce of the North West Group. If he’s not a DS driver, he can maybe put you in touch with other local DS owners.
Sure. if you are still thinking of doing it, get the job all planned out and get your supplies in and it shouldn’t take long at all.
-
AuthorPosts